MiniMax H3シリーズの画像生成モデル「MiniMax H3 Image」が、ComfyUIの公式ワークフローに追加されました。
テキストからの画像生成と、参照画像を使った画像編集を1つのチェックポイントでこなせるのが特徴です。
この記事では、必要なモデルの配置とワークフローの読み込み方法を紹介します。
MiniMax H3 Imageとは?
MiniMax H3 Imageは、MiniMax H3ファミリーに属するオープンウェイトの画像生成・編集モデルです。
テキストから画像を作るtext-to-imageと、1枚以上の参照画像を編集するimage editingを、1つのチェックポイントにまとめています。
アスペクト比を問わず、約16メガピクセルの画像をアップスケーラーなしで直接出力する仕組みです。
サンプリングは6ステップに蒸留されていて、CFGは使いません。
DiTは音声層を除いたH3のアーキテクチャで、テキストエンコーダにはMiniMax H3のものをそのまま使います。
主な特徴
- text-to-imageと画像編集を1つのチェックポイントで行える
- 1:1の4096×4096から21:9の6272×2688まで、約16MPの画像を直接生成する
- 6ステップ(6 NFE)に蒸留済みで、CFGを使わない
- 参照画像は最大16枚まで使える
- テキストエンコーダはMiniMax H3のQwen3-VLテキストエンコーダをそのまま使う
ライセンス
MiniMax H3 Imageのライセンスは、MiniMax H3 Image Community License Agreementです。
元のMiniMax H3のライセンスとは別の契約なので、内容は個別に確認してください。
自分や関連会社の年間売上が100万米ドルを超える場合や、第三者へホステッドサービスを提供する場合は、事前にMiniMaxから書面での許可を得る必要があります。
申請先はMiniMaxのライセンス申請ページです。

ComfyUIのインストール
ComfyUIをまだインストールしていない方は、こちらを参考にしてみてください。

MiniMax H3 Imageは、ComfyUI 0.45.0が対応してるため、それ以下の場合はアップデートが必要です。
Stability Matrixならパッケージ画面から更新、ポータブル版ならupdateフォルダのupdate_comfyui_stable.batで更新できます。
詳細は公式のドキュメントでご確認ください。
必要なモデルのダウンロードと配置
拡散モデル・テキストエンコーダ・VAEに加えて、プロンプト拡張用のQwen3.5 9Bが必要です。
Comfy-Orgは、プロンプト拡張にqwen3.5_9b_w4a8_gptqをGenerate Textノードと組み合わせて使うよう推奨しています。
| 種類 | ファイル名 | 配置先 |
|---|---|---|
| 拡散モデル | minimax_h3_image_pruned_int8_convrot.safetensors | diffusion_models |
| テキストエンコーダ | qwen3vl_32b_minimax_h3_int8_convrot.safetensors | text_encoders |
| プロンプト拡張 | qwen3.5_9b_w4a8_gptq.safetensors | text_encoders |
| VAE | minimax_h3_image_vae_fp16.safetensors | vae |
ComfyUI/
└── models/
    ├── diffusion_models/
    │   └── minimax_h3_image_pruned_int8_convrot.safetensors
    ├── text_encoders/
    │   ├── qwen3vl_32b_minimax_h3_int8_convrot.safetensors
    │   └── qwen3.5_9b_w4a8_gptq.safetensors
    └── vae/
        └── minimax_h3_image_vae_fp16.safetensors
ワークフローの読み込み
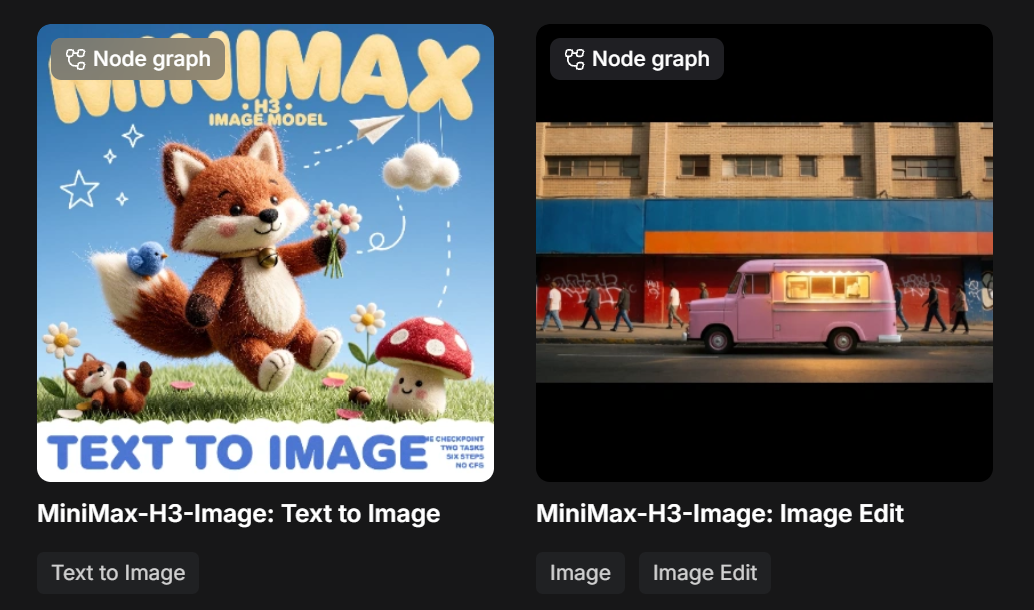
ワークフローは、テキストから画像を生成するものと、画像を編集するものの2種類があります。
テキストから画像生成:image_minimax_h3_image_t2i.json
画像編集用:image_minimax_h3_image_edit.json
またはComfyUIの左上のメニュー→テンプレート参照からも読み込めます。
MiniMax H3 Imageでテキストから画像生成
Resolution Selectorでアスペクト比と解像度を決められます。
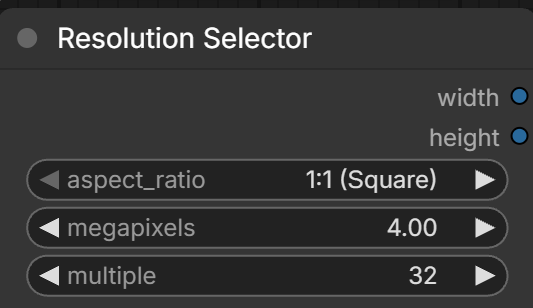
あとはText to Image (MiniMax H3 Image)というサブグラフで生成したい内容を入力し、指定のモデルをセットするだけです。
enable_PE(Prompt Enhancer)はプロンプト拡張なので、短いプロンプトなどから詳細に書かせたい場合は有効だと思います。
ただ自分やLLMに詳細書かせたものはオンでもあまり結果は変わりません。
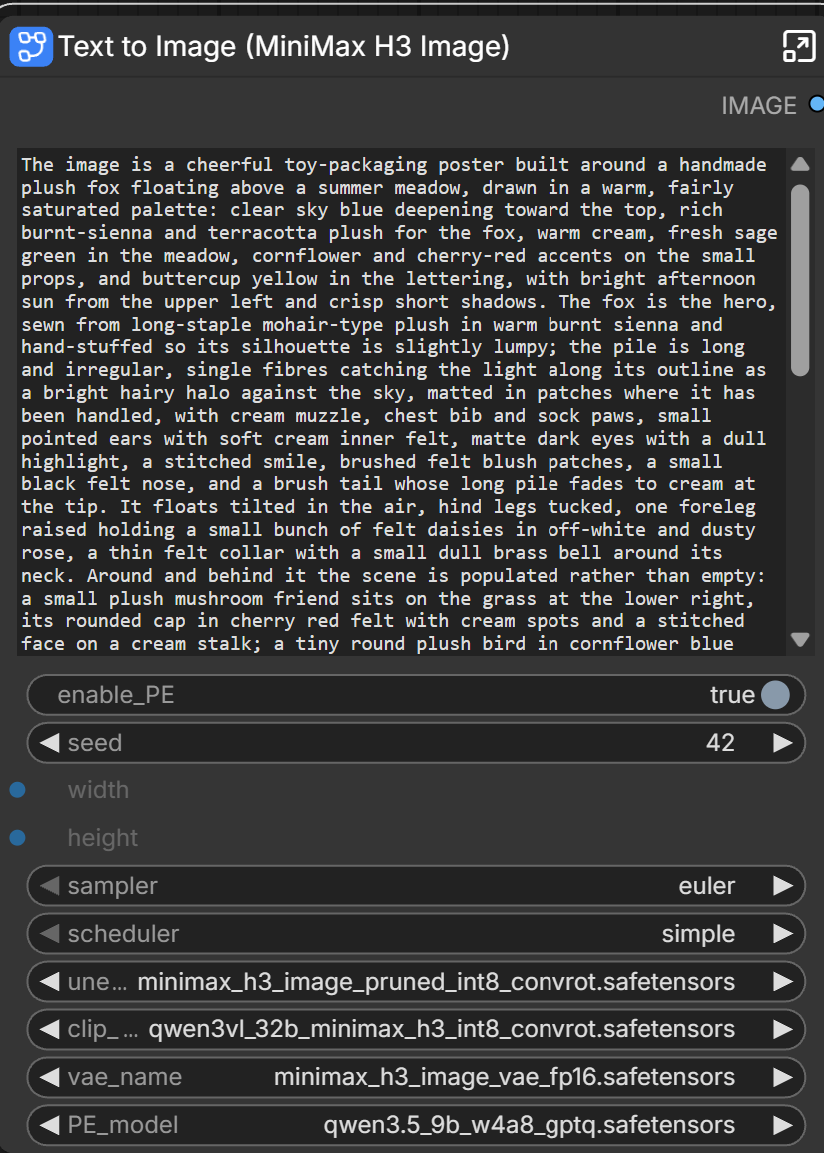
結果:
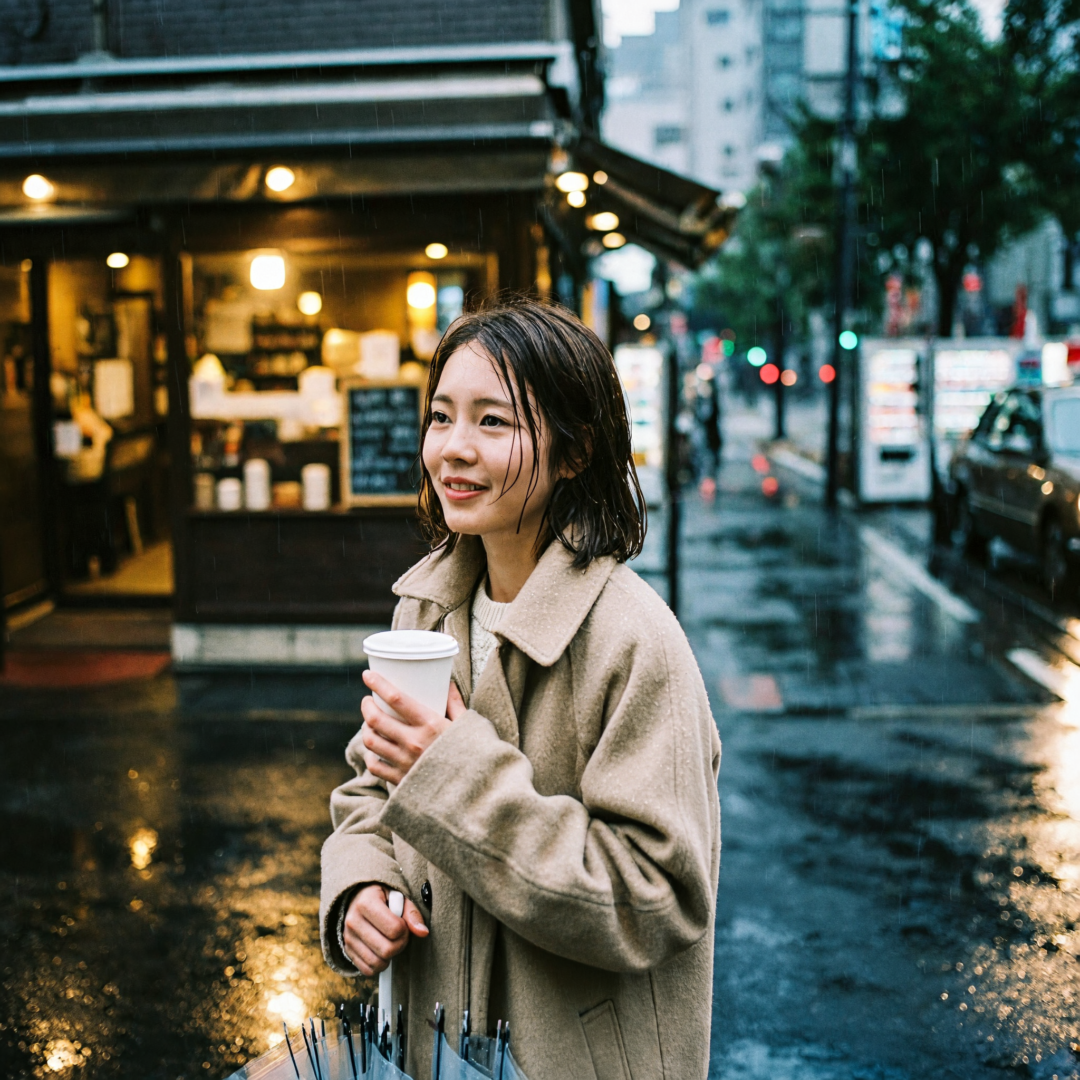
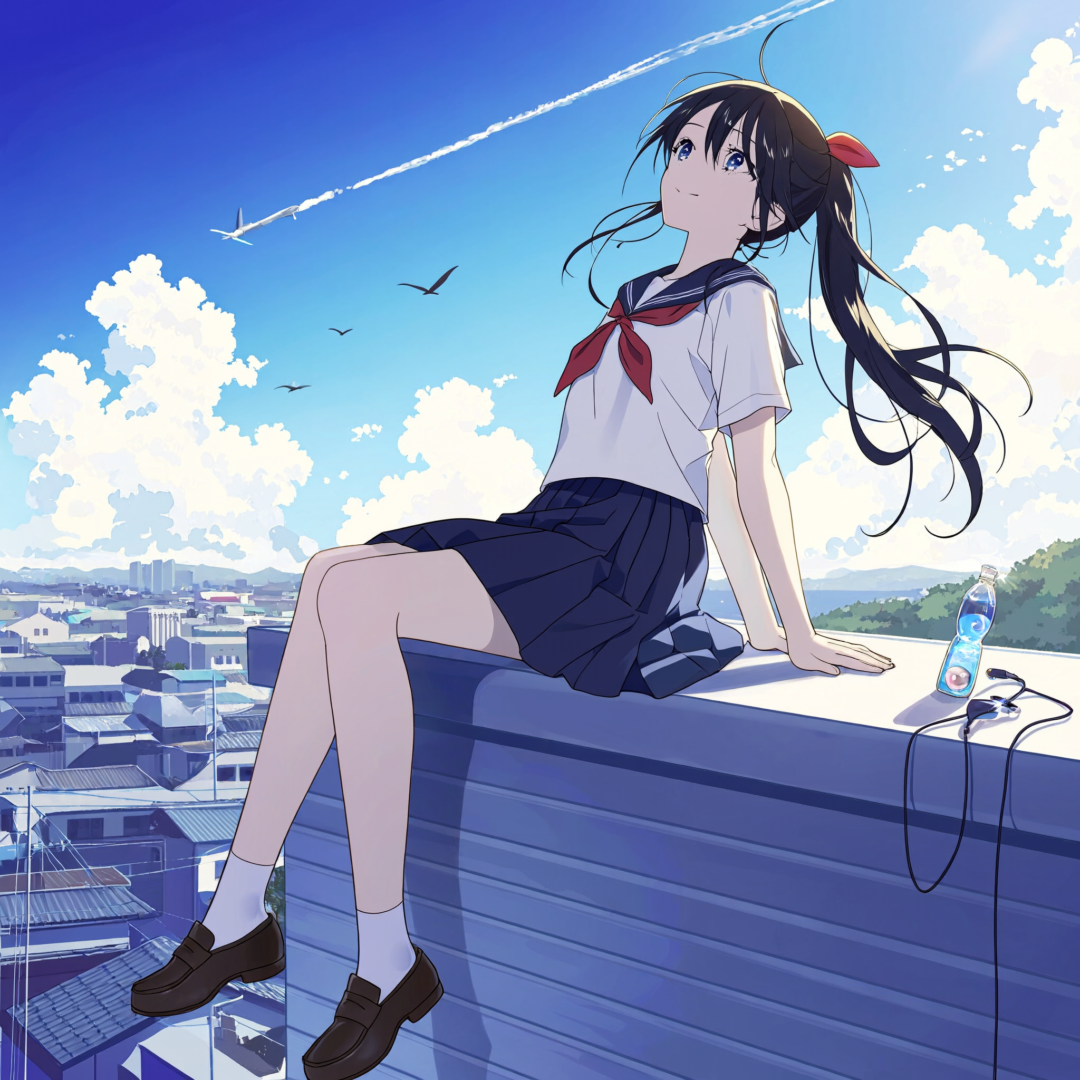
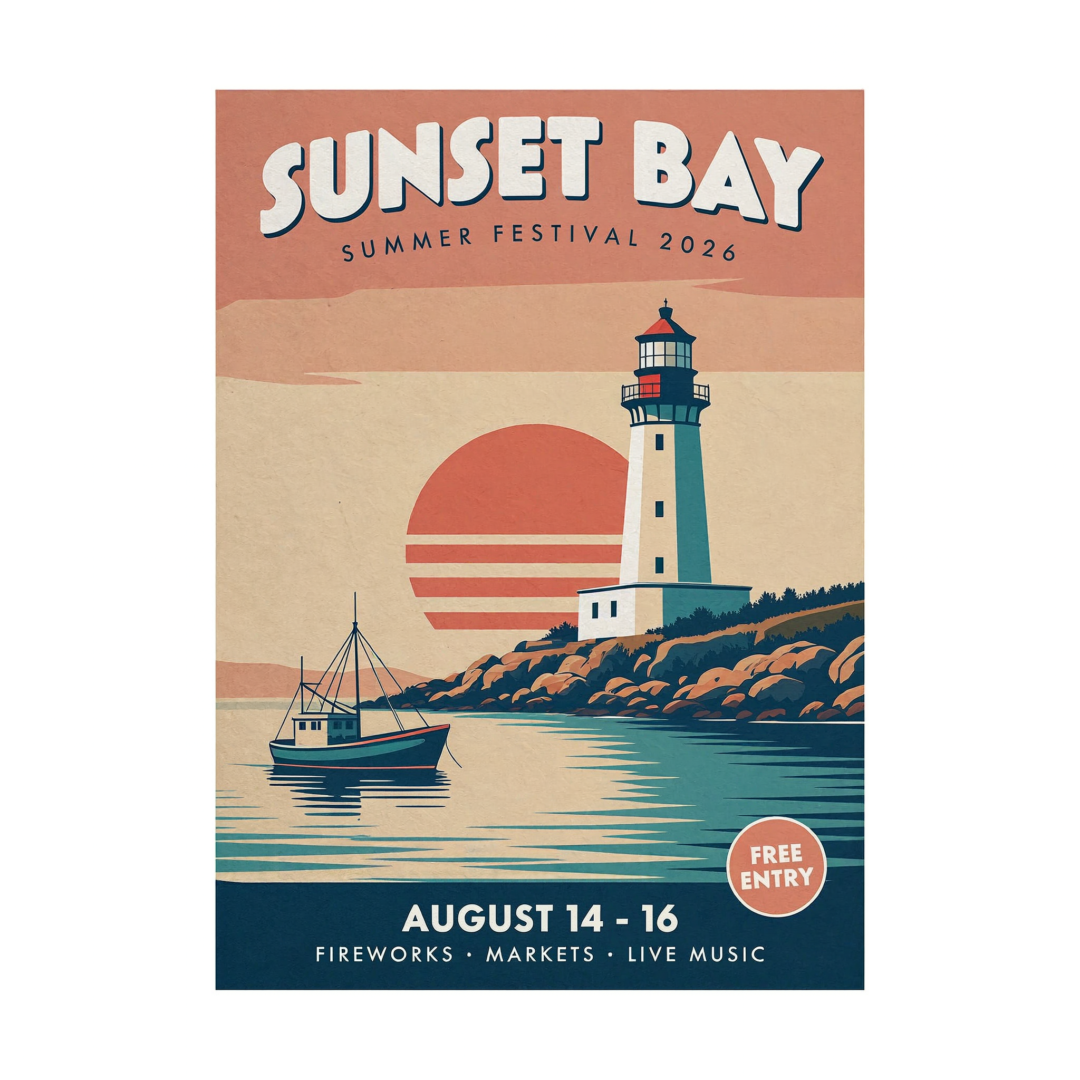
Resolution Selectorはデフォルト、RTX4060Ti(VRAM16GB/RAM64GB)で約14秒でした。
リアル調:
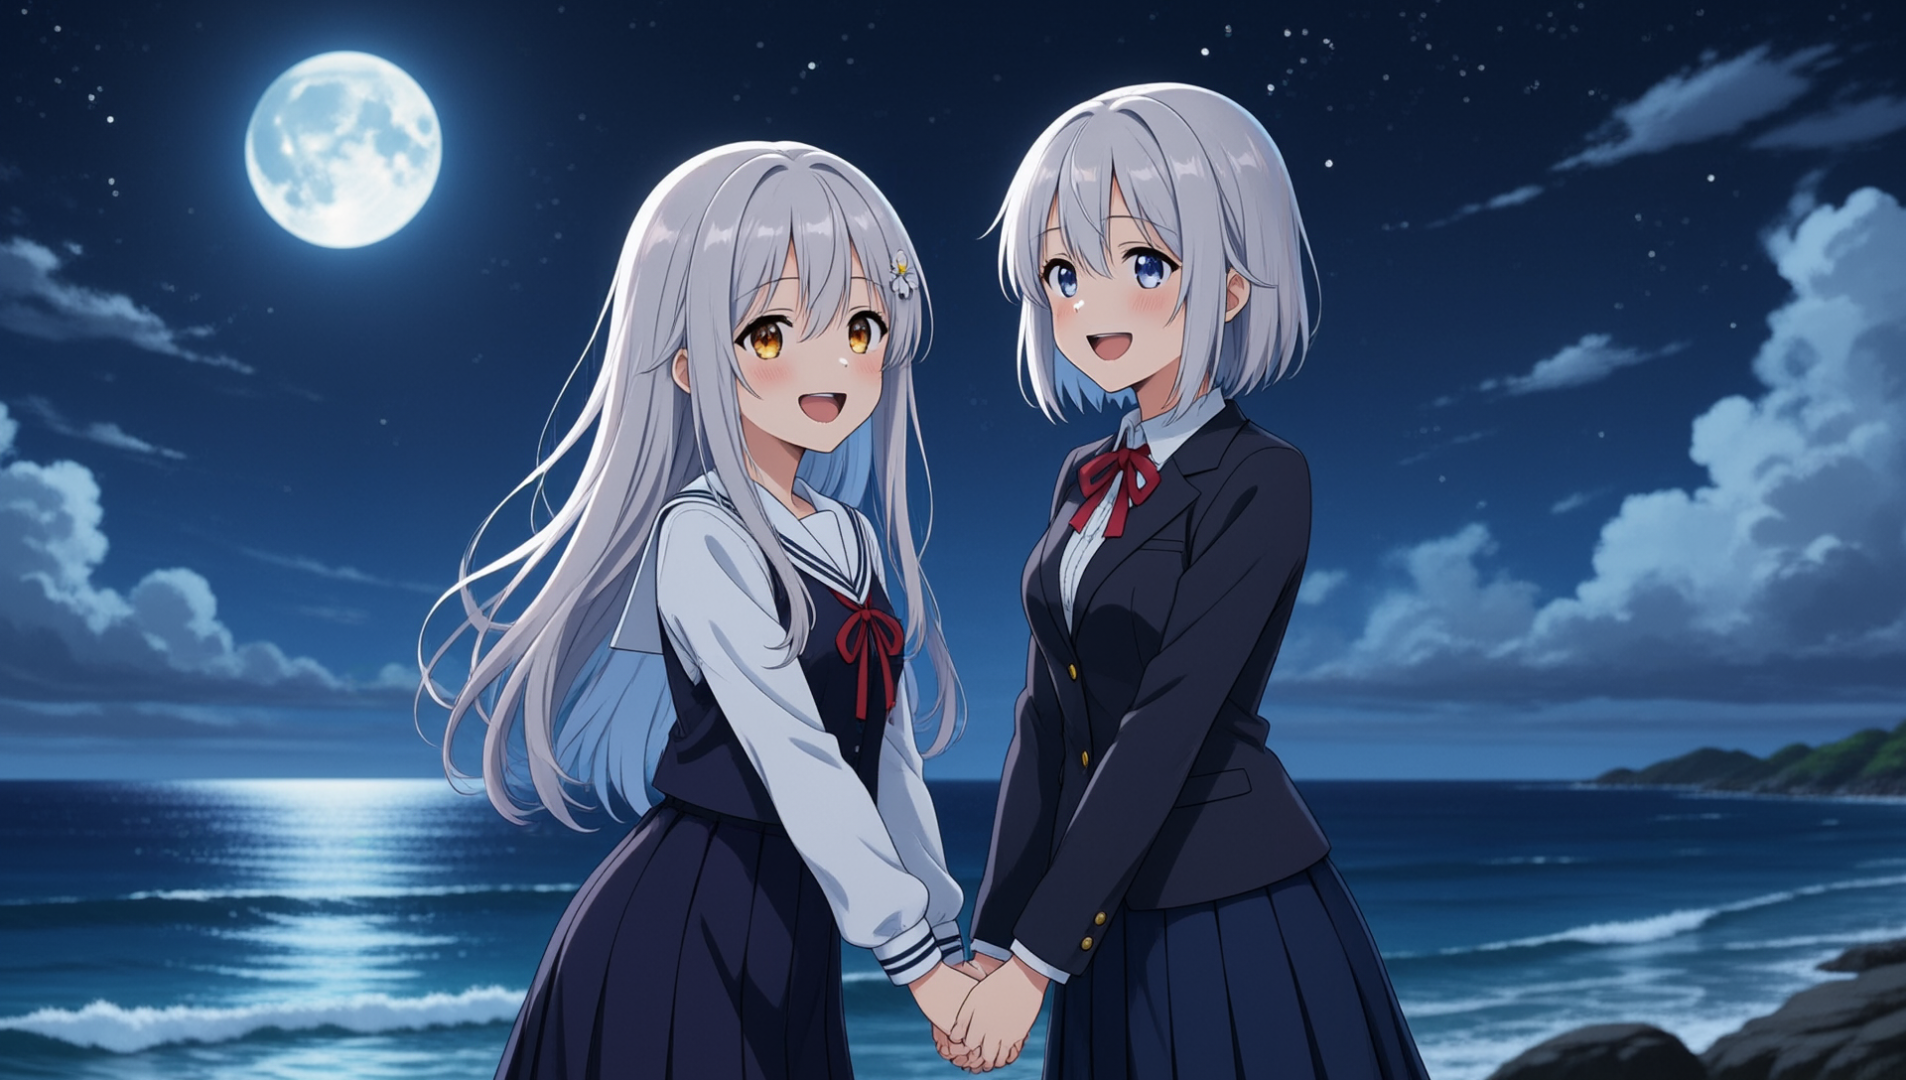
アニメ調:
文字入れ指定:
PEオンだと大体1分40秒~2分の間くらいでした。
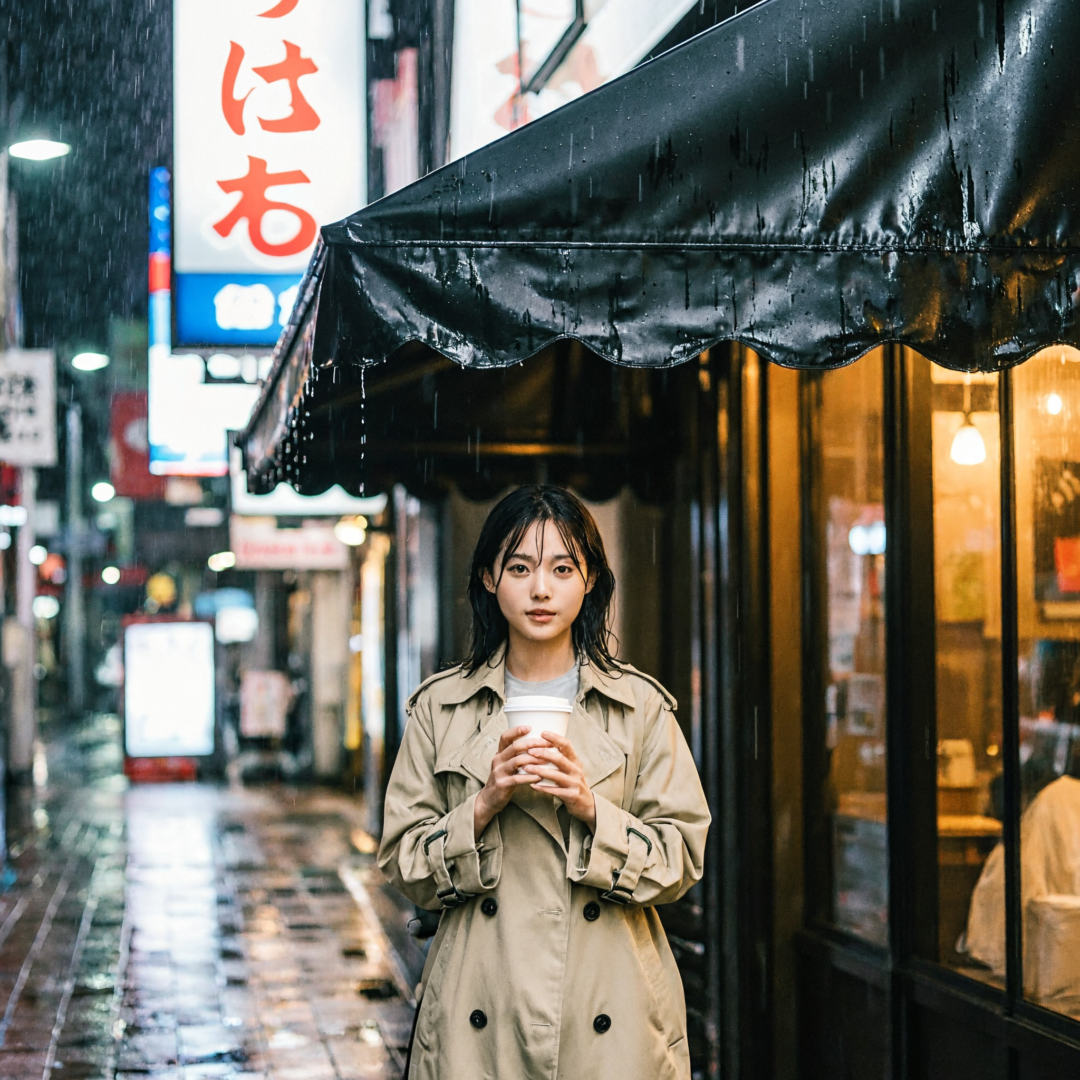
拡張前:
A young woman holding a coffee cup under a cafe awning on a rainy evening in Tokyo, realistic photo.

拡張後:
A photorealistic portrait photograph of a young woman standing under a black fabric cafe awning on a wet Tokyo street at night. She is facing the camera in a front-facing pose, wearing a beige trench coat and holding a white disposable coffee cup with both hands at chest level. Rain streaks vertically across the lens and drips onto the awning's surface. In the background, out-of-focus illuminated signs display red and blue Japanese kanji characters, reflected on the glossy pavement below. The lighting is atmospheric, combining warm yellow glow from the cafe interior and cool ambient streetlights. Her dark hair is slightly damp. The composition is vertical, focusing on the subject and the immediate rainy environment.
MiniMax H3 Imageで画像編集
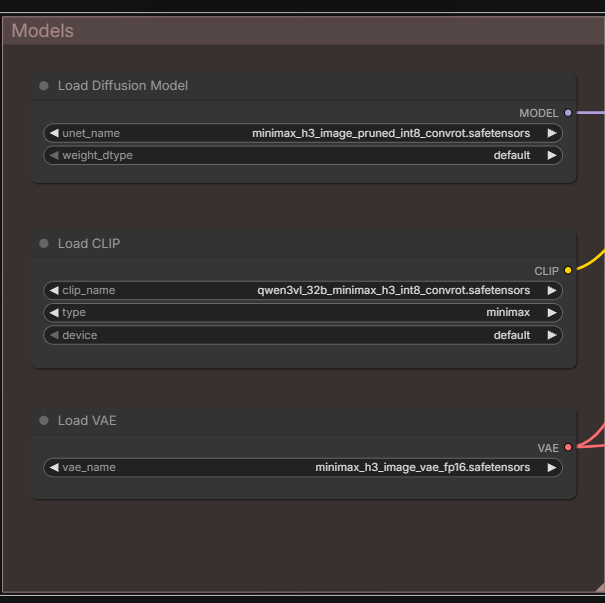
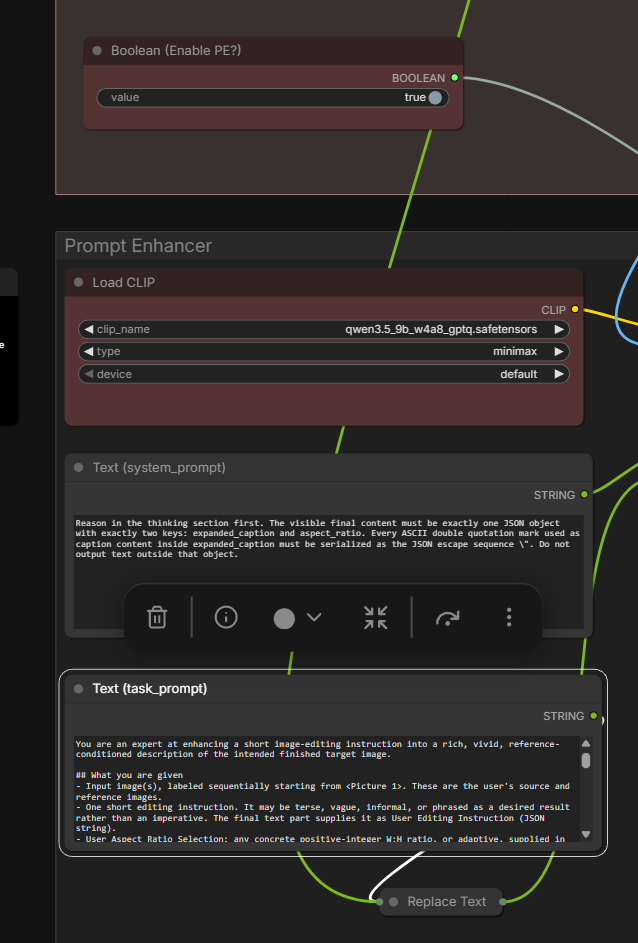
まずModelsグループでモデルをセットします。
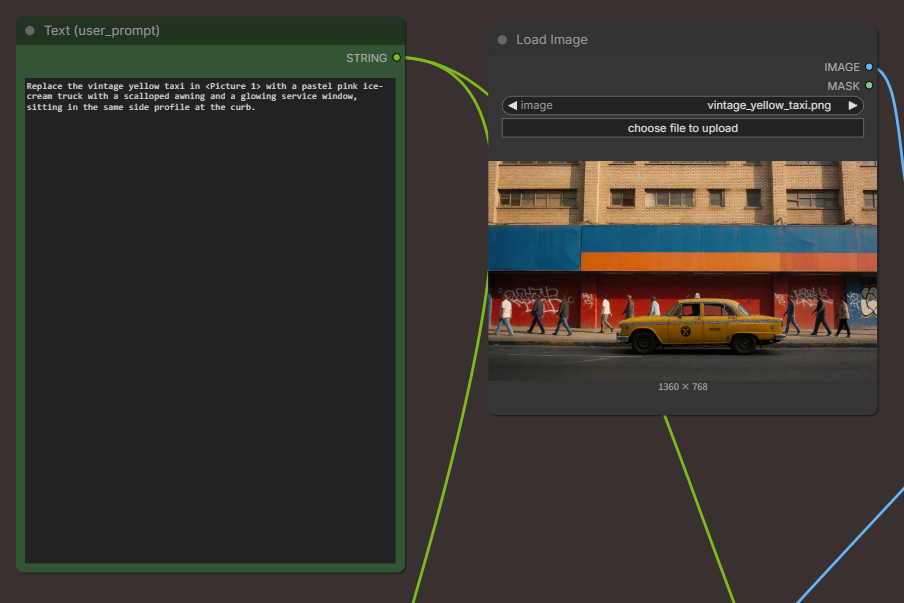
編集したい画像をLoad Imageに取り込んで、Text (user_prompt)にその画像をどう編集したいか入力します。
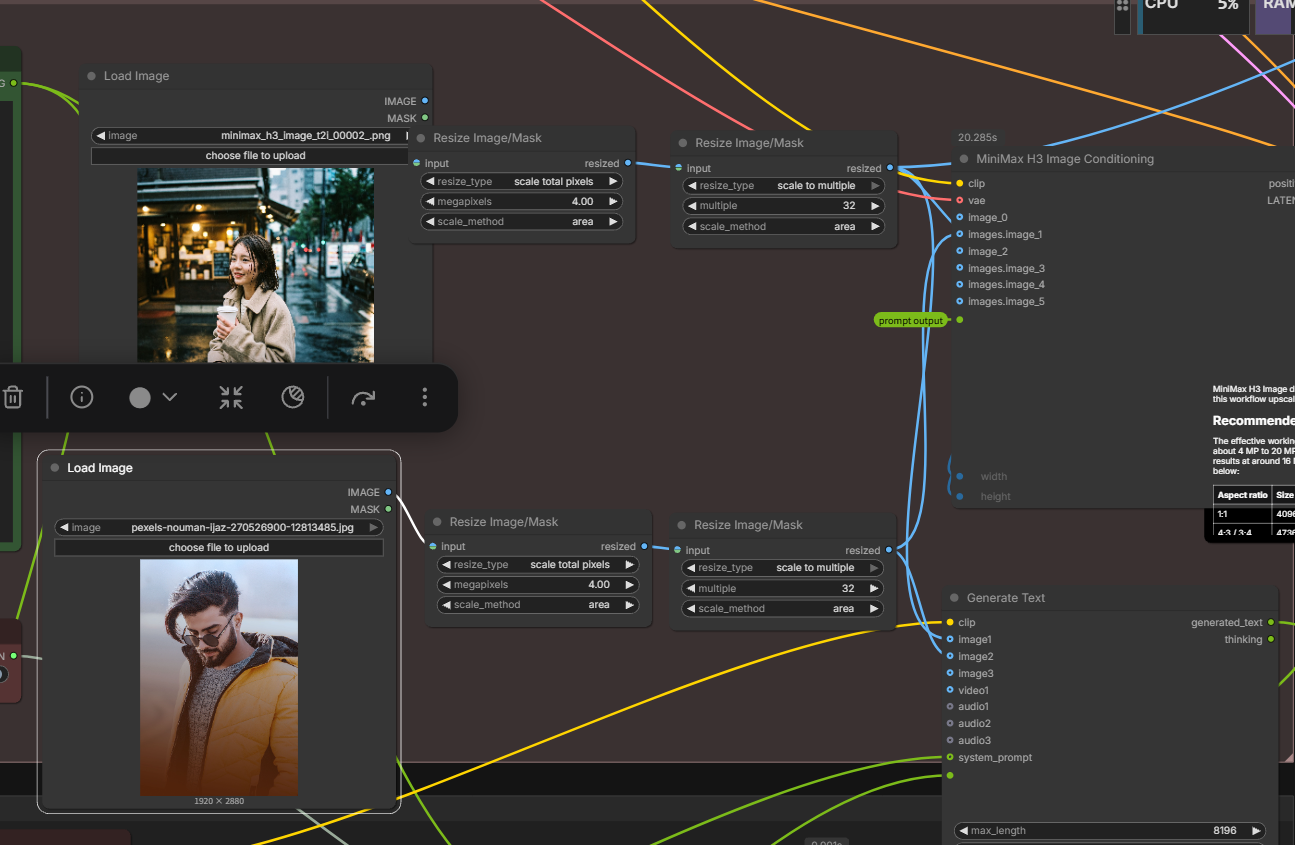
画像を複数入力する場合はLoad ImageとResize Image/Mask×2をセットで追加して、MiniMax H3 Image Conditioning・Generate Textに繋ぎます。
低解像度に弱いため、Resize Image/Maskで4MPへアップスケールして、縦横を32の倍数に丸めているそうです。
あと下の画像はGenerate Textに繋いでますが、PE使わない場合はGenerate Textに繋ぐ必要はありません。
Boolean (Enable PE?)をオンにするとプロンプトが拡張され、下のText (system_prompt)・Text (task_prompt)でどう拡張するかを指定できます。
結果:
処理はPEオフが約58秒、オンだと約2分15秒でした。
1枚だけでやったもので、左から元画像、PEオフ、PEオンです。
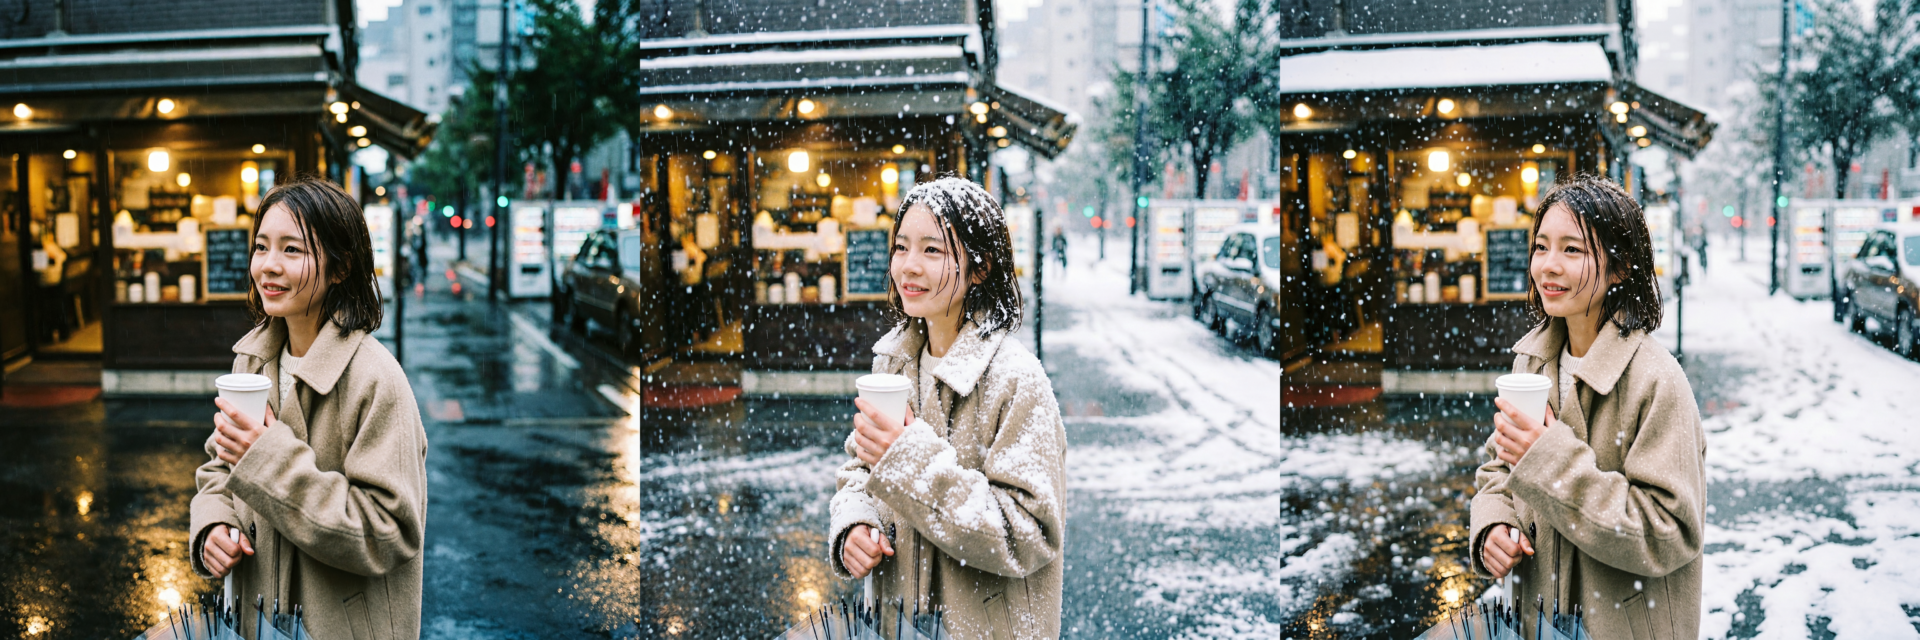
プロンプト:
拡張前::
Change the rain in <Picture 1> to falling snow, keeping the woman the same.

拡張後:
The woman with short dark hair wearing a beige coat in <Picture 1> is <Subject 1>. The target image shows a street scene where the falling rain is transformed into falling snow, while keeping the woman the same. <Subject 1> is partially preserved; the ambient weather shifts from rain to snow while her appearance remains unchanged. The raindrops falling in the air are replaced by gentle snowflakes drifting downwards. The wet, reflective pavement in the foreground and background streets now features accumulated white snow, with some puddles still catching the reflection of the shop lights. The warm yellow glow from the storefront cafe on the left illuminates the scene, casting light on the woman's face and the wet ground. The background, featuring blurred city lights, traffic signals, and vending machines, remains visible through the new snowy atmosphere. The woman holds a white paper coffee cup and a closed transparent umbrella.
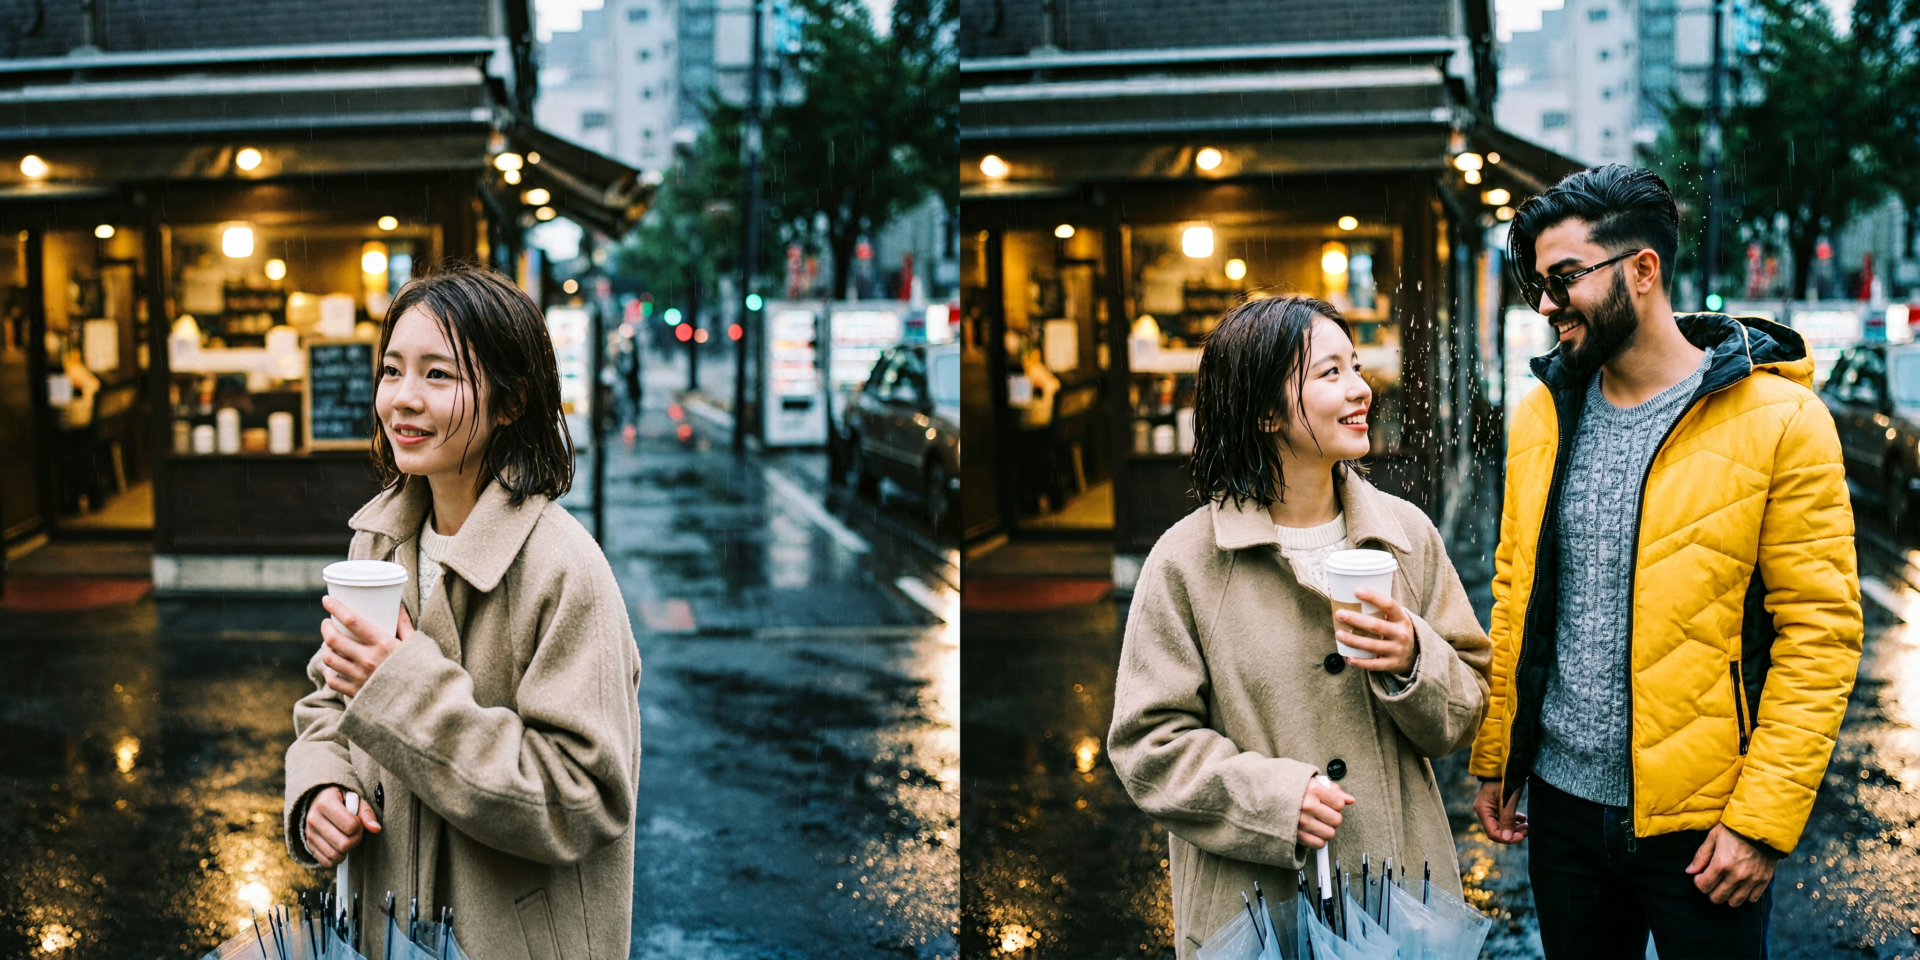
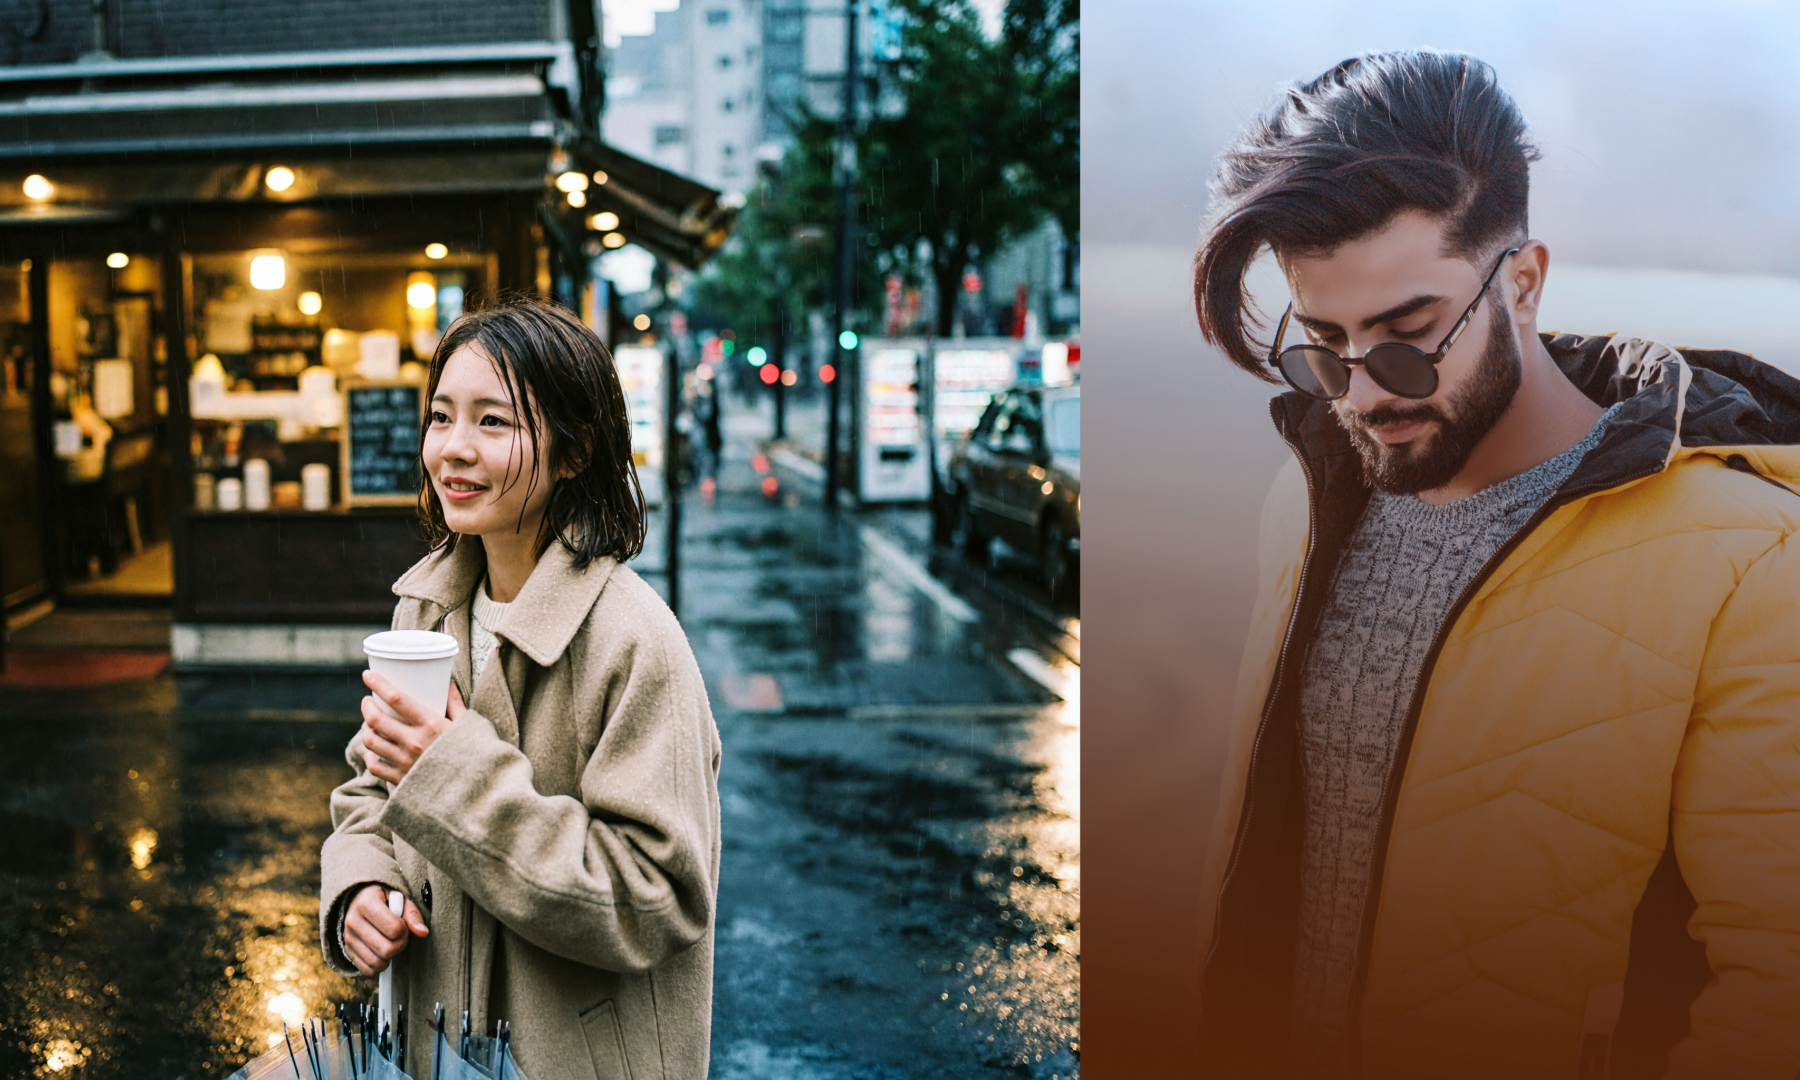
あと男女の画像2枚で会話してる風の編集にしてみました。
使用した元画像:
結果:
左がPEオフ、右がPEオンで、PEオフが約1分44秒、PEオンで約4分でした。
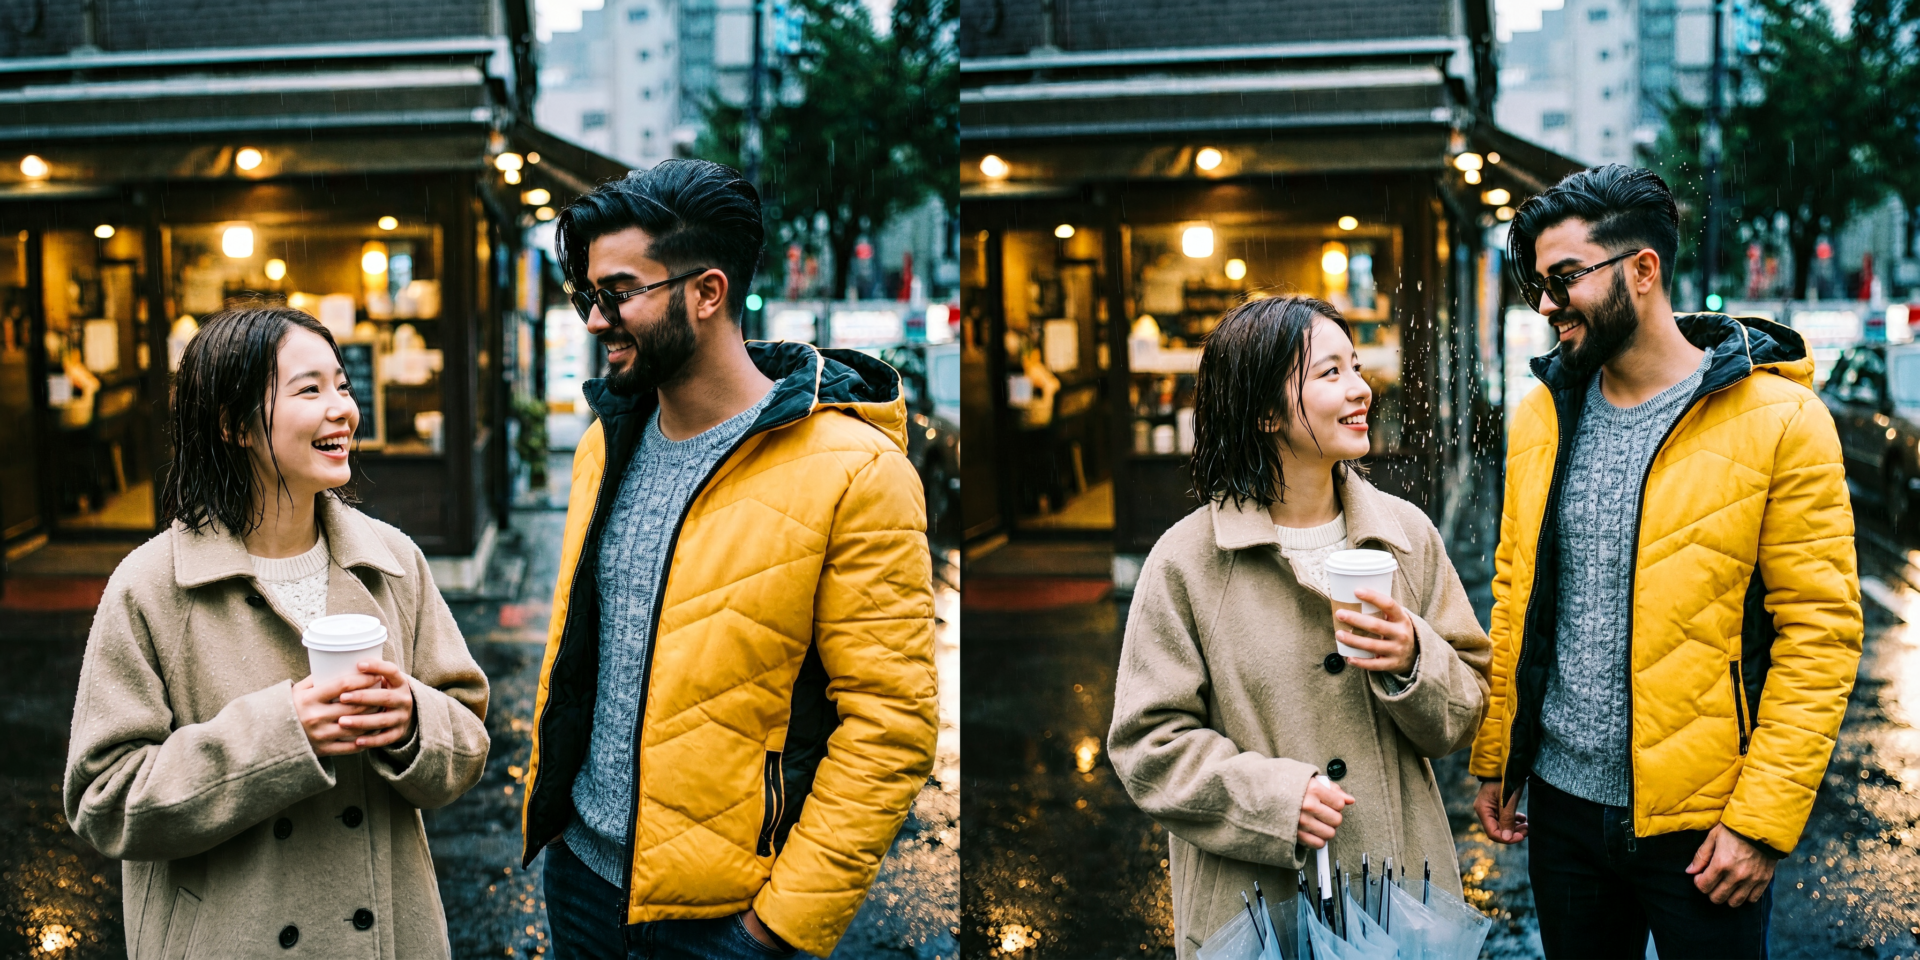
拡張前:
Add the man from <Picture 2> next to the woman in <Picture 1>, and make them face each other and talk happily in front of the cafe in the rain.

拡張後:
The woman in a beige coat holding a coffee cup and an umbrella in <Picture 1> is <Subject 1>. The man with a beard wearing sunglasses and a yellow jacket in <Picture 2> is <Subject 2>. The cafe storefront with warm interior lights in <Picture 1> is <Subject 3>. The target image shows <Subject 1> and <Subject 2> standing side by side on a wet street in the rain, facing each other and smiling as they talk. <Subject 1> is partially preserved; her body remains but her face turns to face the man while her umbrella is adjusted to shield both. <Subject 2> is partially preserved; his identity and clothing transfer fully, his head tilts up and he looks at the woman with a smile. <Subject 3> is fully preserved. The man stands to the right of the woman, occupying the previously empty negative space beside her. Their proximity creates a new focal point of interaction. Raindrops streak down between their heads and shoulders, connecting them visually. The wet pavement stretches out between them, reflecting the ambient light.
推奨される画像サイズ
ワークフローのNoteによると、MiniMax H3 Imageの有効な範囲はおよそ4MP〜20MPで、16MP前後で最も良い結果になりやすいようです。
テキストから画像生成のワークフローは初期値を4MPに抑えているので、GPUのメモリに余裕があればサイズを上げてください。
編集用のワークフローでは、低解像度に弱い点に合わせて、最初に入力画像を4MPへアップスケールしています。
16MPの主なサイズは以下の通りです。
| アスペクト比 | サイズ(幅x高さ) |
|---|---|
| 1:1 | 4096×4096 |
| 4:3 / 3:4 | 4736×3552 / 3552×4736 |
| 3:2 / 2:3 | 5024×3360 / 3360×5024 |
| 16:9 / 9:16 | 5472×3072 / 3072×5472 |
| 21:9 | 6272×2688 |
まとめ
まずT2Iはどのスタイルでも細かい部分の描写崩れが気になりました。
Redditでも評価分かれてましたが、リアル・アニメ共にどっちもちょっと微妙です。
何らかの補正処理使えば多少マシになりそうですが、なんか派生モデルが出たり、対処方法が出ない限り、画像生成は既存のモデルで十分な気がします。
編集についてはプロンプトの追従性が良くて、わりと使いやすそうに感じました。
まだ試行回数少ないので実用できるかはわかりませんが、これでI2V用の素材だったり、漫画の構図だったり自由に作れるなら、いろんなシーンで役立つと思います。
以上MiniMax H3 Imageについて紹介しました。
参考になれば幸いです。