【ComfyUI】Flux.3 Image Kleinでテキストから画像生成・画像編集する方法

Black Forest Labsから、5.6Bパラメータのオープンウェイト画像モデルFlux.3 Image Kleinが公開されました。

ComfyUIの公式ワークフローも用意されており、テキストからの画像生成と画像編集に対応しています。

この記事では、必要なモデルの配置と公式ワークフローの使い方まで紹介します。

Flux.3 Image Kleinとは?

Flux.3 Image Kleinは、Black Forest Labsが公開した5.6Bパラメータのオープンウェイト画像モデルです。

1つのモデルで、テキストからの画像生成、最大10枚の参照画像を使った編集、バウンディングボックスによるレイアウト指定を行うことができます。

生成と編集には蒸留版のKlein、ファインチューニングやLoRA学習、研究にはKlein Baseという使い分けです。

モデルはプロンプトアップサンプラーが書くキャプションで学習しているので、入力したプロンプトをそのまま渡すと結果が弱くなります。

主な特徴

  • テキストからの画像生成、参照画像1枚での編集、複数の参照画像を使った生成を1つのモデルで行える
  • 編集に使える参照画像は最大10枚
  • 0〜1000のグリッド上のバウンディングボックスで、要素の配置と大きさを指定できる
  • 画像内の文字描画に対応
  • 解像度は最大4K
  • プロンプトアップサンプラーが付属する
GitHub – black-forest-labs/flux-3-image-klein: FLUX 3 Image Klein: reference inference code
FLUX 3 Image Klein: reference inference code. Contribute to black-forest-labs/flux-3-image-klein development by creating…

ライセンス

Flux.3 Image Kleinのモデル本体のライセンスは、FLUX Kommunity Licenseです。

非商用での利用に加えて、関連会社を含む年間総収益が500万米ドル未満の対象ユーザーには、条件付きで生成物の商用利用が認められています。

それ以外の用途では、Black Forest Labsの商用ライセンスを確認してください。

なお、テキストエンコーダーのQwen3-VL-4B-Instructとプロンプトアップサンプラーのライセンスは、Apache-2.0です。

詳しい条件はLICENSE.mdに書かれています。

ComfyUIのインストール

ComfyUIをまだインストールしていない方は、こちらを参考にしてみてください。

【ComfyUI】の使い方・始め方まとめ|インストールから基本操作・カスタムノードまで
ComfyUIを始めたいけど、インストール方法がいくつかあってどれを選べばいいか迷う、という方は多いと思います。この記事では、ComfyUIの導入方法の違いと選び方、そして基本的な使い方の入口をまとめて紹介します。各トピックの詳しい手順は、…

また最新版へバージョンアップが必要です。

Stability Matrixならパッケージ画面から更新、ポータブル版ならComfyUI_windows_portable\update\update_comfyui.batを実行すればOKです。

必要なモデルのダウンロードと配置

ComfyUI用のファイルは、Black Forest Labsが配布しているflux-3-image-klein-comfyからダウンロードできます。

sdが付いている方が蒸留モデルです。

プロンプトアップサンプラーは元のPromptを詳細に書き直してくれるもので、公式も使用を推奨しています。

実際のworkflowではON/OFFが可能です。

またダウンロードするにはHugging Face上で利用承諾・認証が必要なので、アカウント作成後、同意ボタンを押してからダウンロードしてください。

種類ファイル名配置先
拡散モデルflux3_image_klein_sd_int8_convrot.safetensorsmodels/diffusion_models
拡散モデルflux3_image_klein_base_int8_convrot.safetensorsmodels/diffusion_models
テキストエンコーダーqwen3vl_4b_int8_convrot.safetensorsmodels/text_encoders
プロンプトアップサンプラーqwen3.5_9b_flux3_prompt_upsampler_int8_convrot.safetensorsmodels/text_encoders
プロンプトアップサンプラーqwen3.5_9b_flux3_prompt_upsampler_w4a8.safetensorsmodels/text_encoders
VAEflux2-vae.safetensorsmodels/vae
ComfyUI/
└── models/
    ├── diffusion_models/
    │   ├── flux3_image_klein_sd_int8_convrot.safetensors
    │   └── flux3_image_klein_base_int8_convrot.safetensors
    ├── text_encoders/
    │   ├── qwen3vl_4b_int8_convrot.safetensors
    │   ├── qwen3.5_9b_flux3_prompt_upsampler_int8_convrot.safetensors
    │   └── qwen3.5_9b_flux3_prompt_upsampler_w4a8.safetensors
    └── vae/
        └── flux2-vae.safetensors
black-forest-labs/flux-3-image-klein-comfy · Hugging Face
We’re on a journey to advance and democratize artificial intelligence through open source and open science.

ワークフローの読み込み

ComfyUI向けの公式ワークフローは、蒸留版とBase版でそれぞれテキストから画像生成と画像編集の4種類です。

リンク先右上にある矢印アイコンからダウンロードできます。

使いたいワークフローのJSONをダウンロードし、ComfyUIの画面へドラッグ&ドロップするか、ComfyUIのテンプレート参照から読み込んでください。

ただ執筆時点でComfyUIのテンプレート参照は最新版になってないみたいです。

後述するBounding boxesとか使いたい場合は、JSONの方を使ってください。
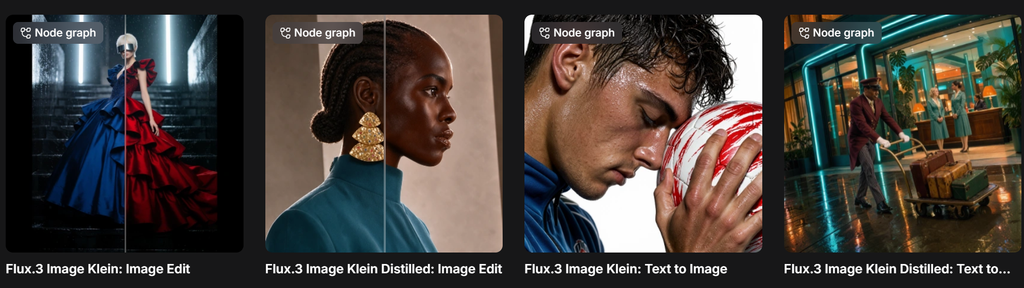
ComfyUIのテンプレート一覧に並ぶFlux.3 Image Kleinの4種類のワークフロー

Flux.3 Image Klein Baseでテキストから画像生成

まずText to Image (Flux.3 Image Klein)でモデルとパラメーターをセットします。

step数についてはクオリティを求める場合、50が良いそうです。
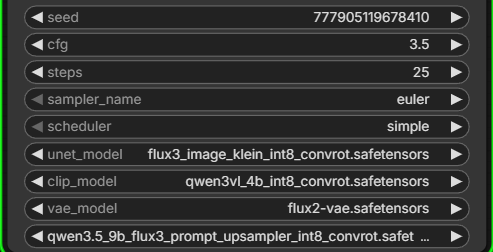
Text to Image (Flux.3 Image Klein)サブグラフでモデルとパラメーターを設定する画面

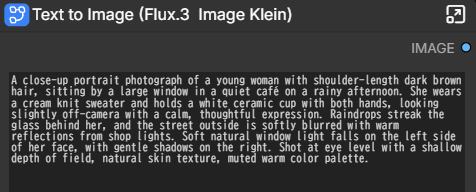
上部の入力欄で生成したい画像のPromptを入力します。

上部の入力欄に生成したい画像のPromptを入力する画面

プロンプトアップサンプラーを使いたい方はenable_prompt_upsamplerをONにしてください。

enable_prompt_upsamplerのON/OFF切り替え

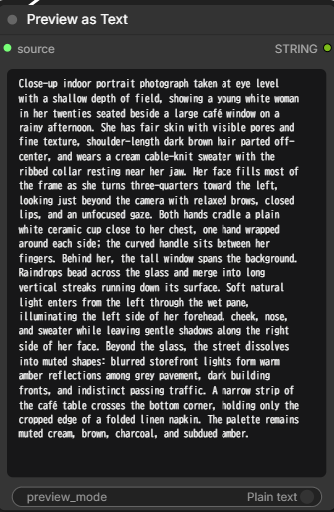
結果はサブグラフ内のPreview as Textで見れます。

サブグラフ内のPreview as Textに表示されたアップサンプラーの書き直し結果

Resolution Selectorで解像度やアスペクト比を変えられます。
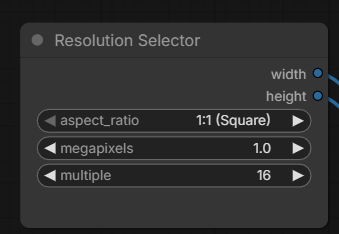
Resolution Selectorで解像度とアスペクト比を設定する画面

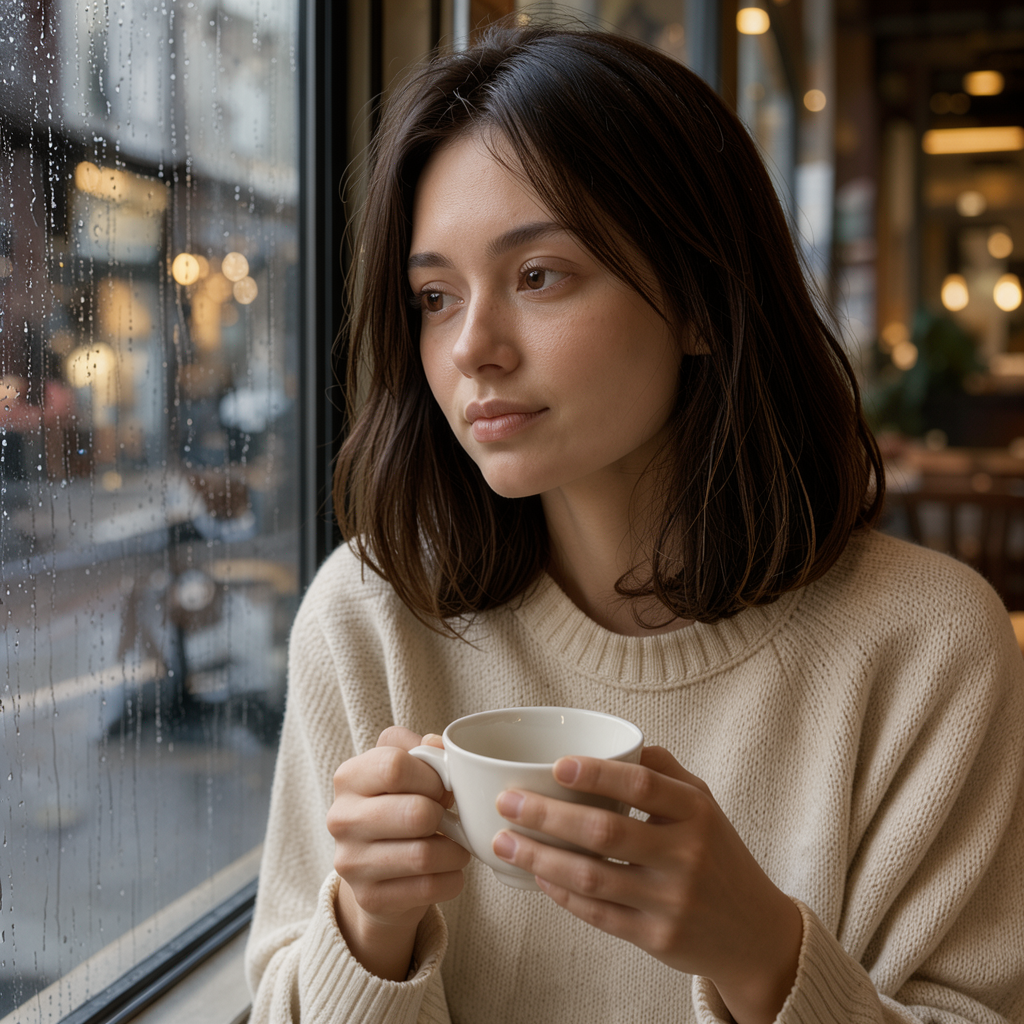
結果:

RTX4060Ti(VRAM16GB/RAM64GB)で約20秒、アップサンプラーありで約34秒でした。

・フォトリアル
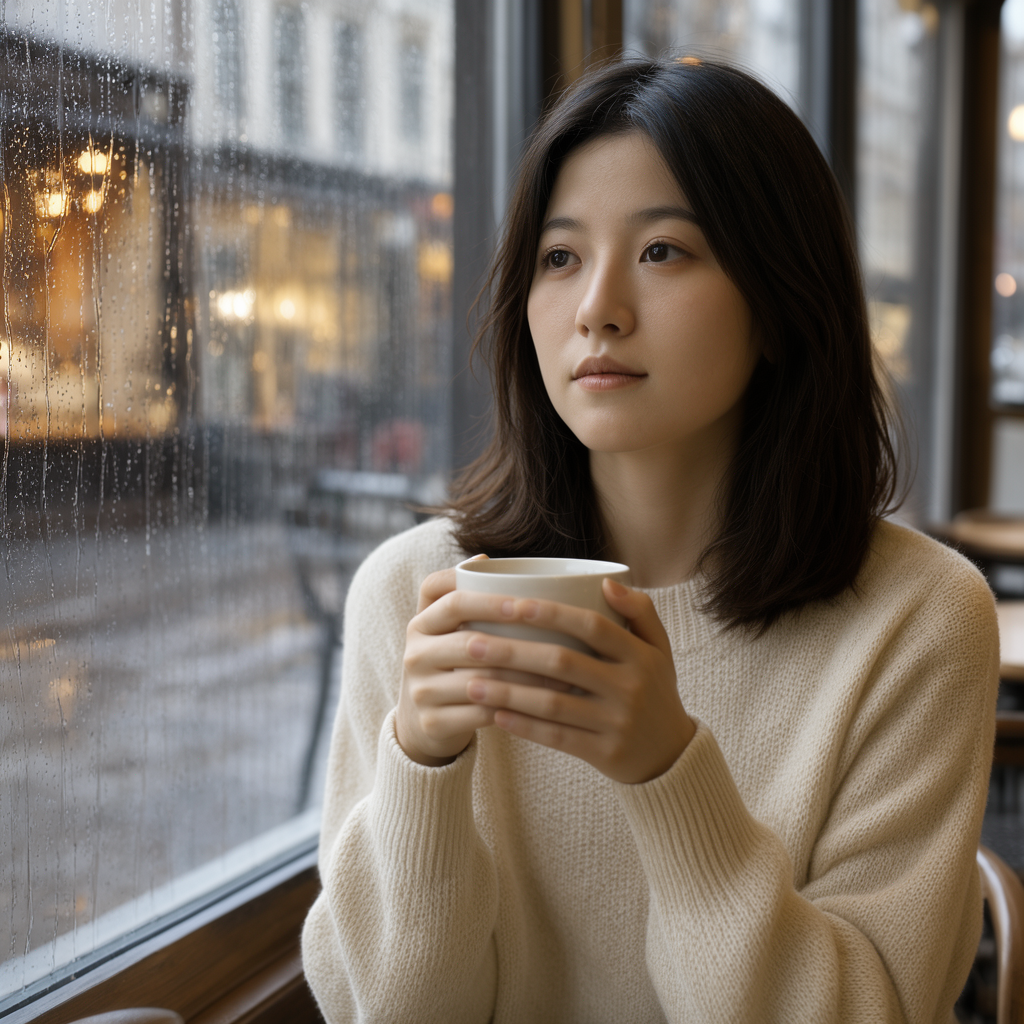
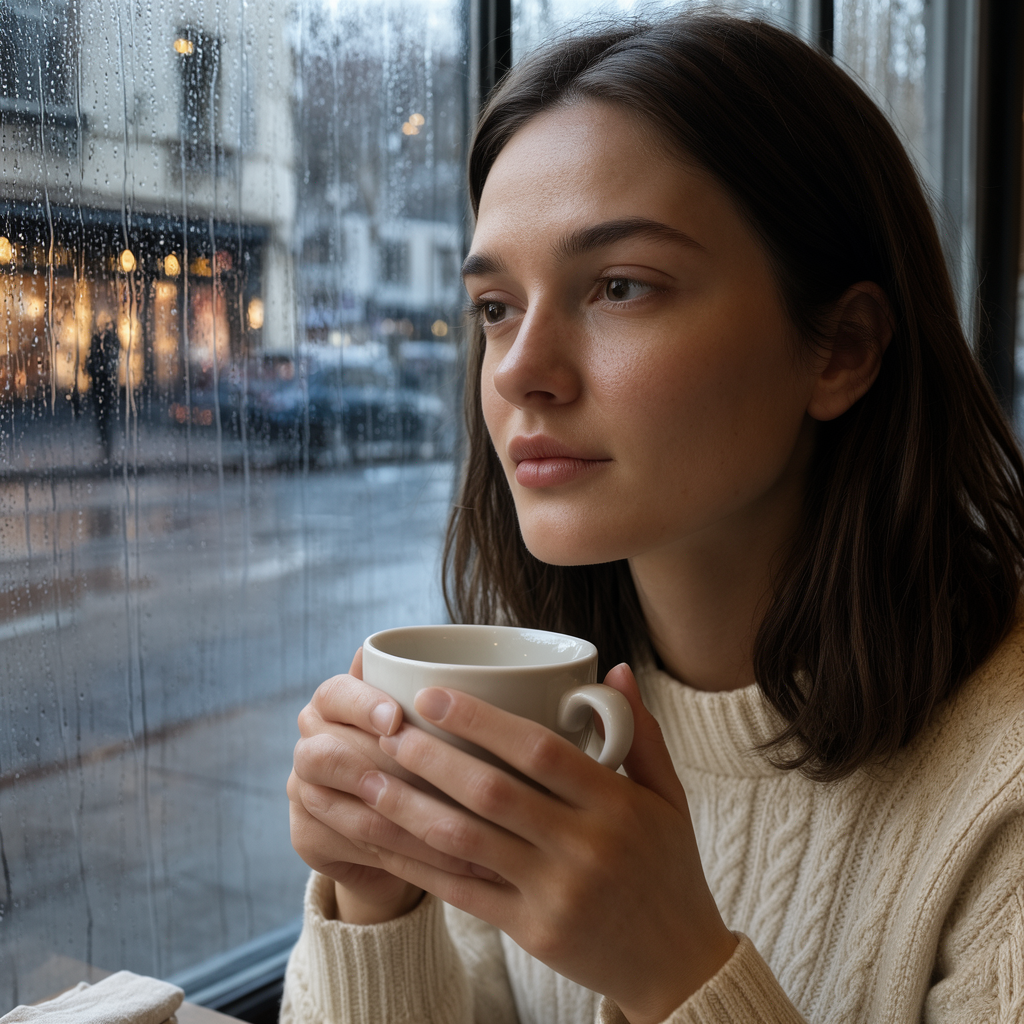
Flux.3 Image Klein Baseで生成した雨のカフェの窓辺でカップを持つ女性のフォトリアル画像
A close-up portrait photograph of a young woman with shoulder-length dark brown hair, sitting by a large window in a quiet café on a rainy afternoon. She wears a cream knit sweater and holds a white ceramic cup with both hands, looking slightly off-camera with a calm, thoughtful expression. Raindrops streak the glass behind her, and the street outside is softly blurred with warm reflections from shop lights. Soft natural window light falls on the left side of her face, with gentle shadows on the right. Shot at eye level with a shallow depth of field, natural skin texture, muted warm color palette.

・フォトリアル+アップサンプラー

Flux.3 Image Klein Baseでアップサンプラーを使って生成したフォトリアル画像
Close-up indoor portrait photograph taken at eye level with a shallow depth of field, showing a young white woman in her twenties seated beside a large café window on a rainy afternoon. She has fair skin with visible pores and fine texture, shoulder-length dark brown hair parted off-center, and wears a cream cable-knit sweater with the ribbed collar resting near her jaw. Her face fills most of the frame as she turns three-quarters toward the left, looking just beyond the camera with relaxed brows, closed lips, and an unfocused gaze. Both hands cradle a plain white ceramic cup close to her chest, one hand wrapped around each side; the curved handle sits between her fingers. Behind her, the tall window spans the background. Raindrops bead across the glass and merge into long vertical streaks running down its surface. Soft natural light enters from the left through the wet pane, illuminating the left side of her forehead, cheek, nose, and sweater while leaving gentle shadows along the right side of her face. Beyond the glass, the street dissolves into muted shapes: blurred storefront lights form warm amber reflections among grey pavement, dark building fronts, and indistinct passing traffic. A narrow strip of the café table crosses the bottom corner, holding only the cropped edge of a folded linen napkin. The palette remains muted cream, brown, charcoal, and subdued amber.

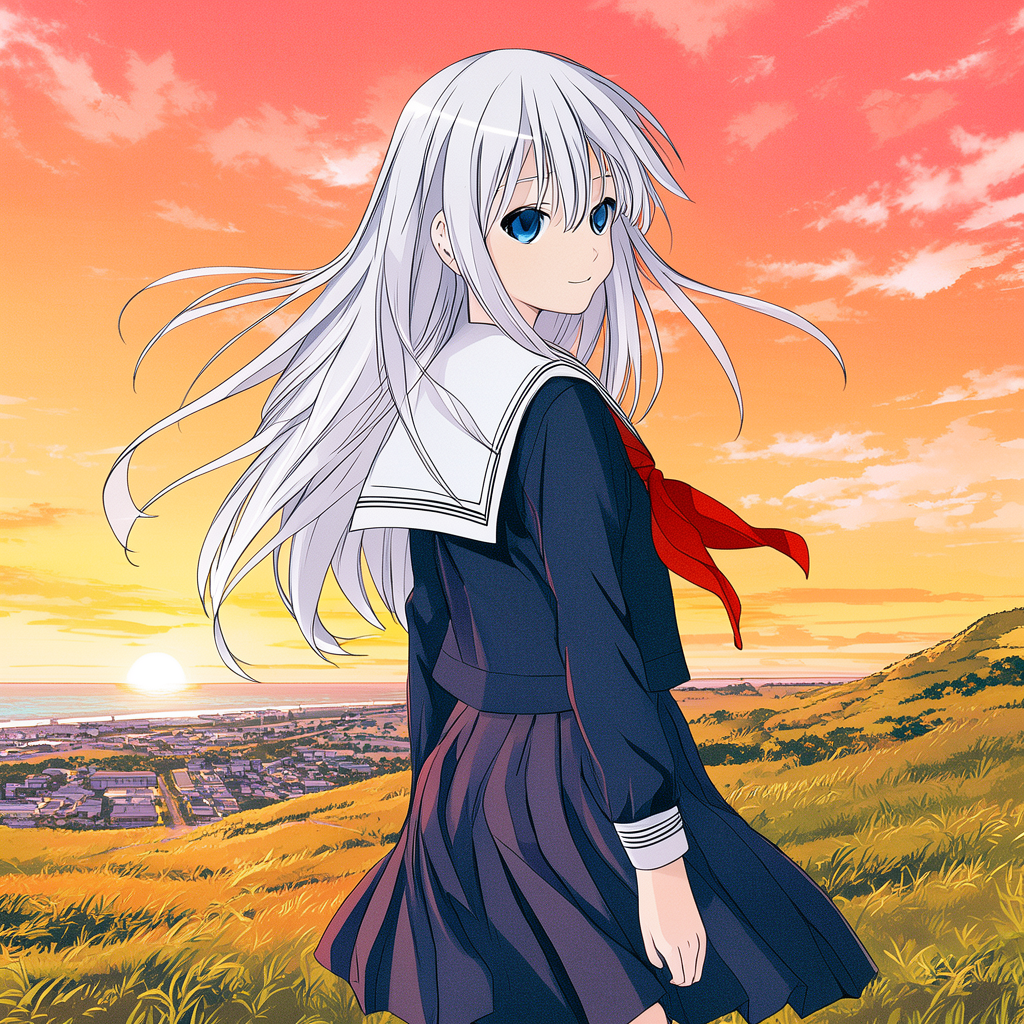
・アニメ

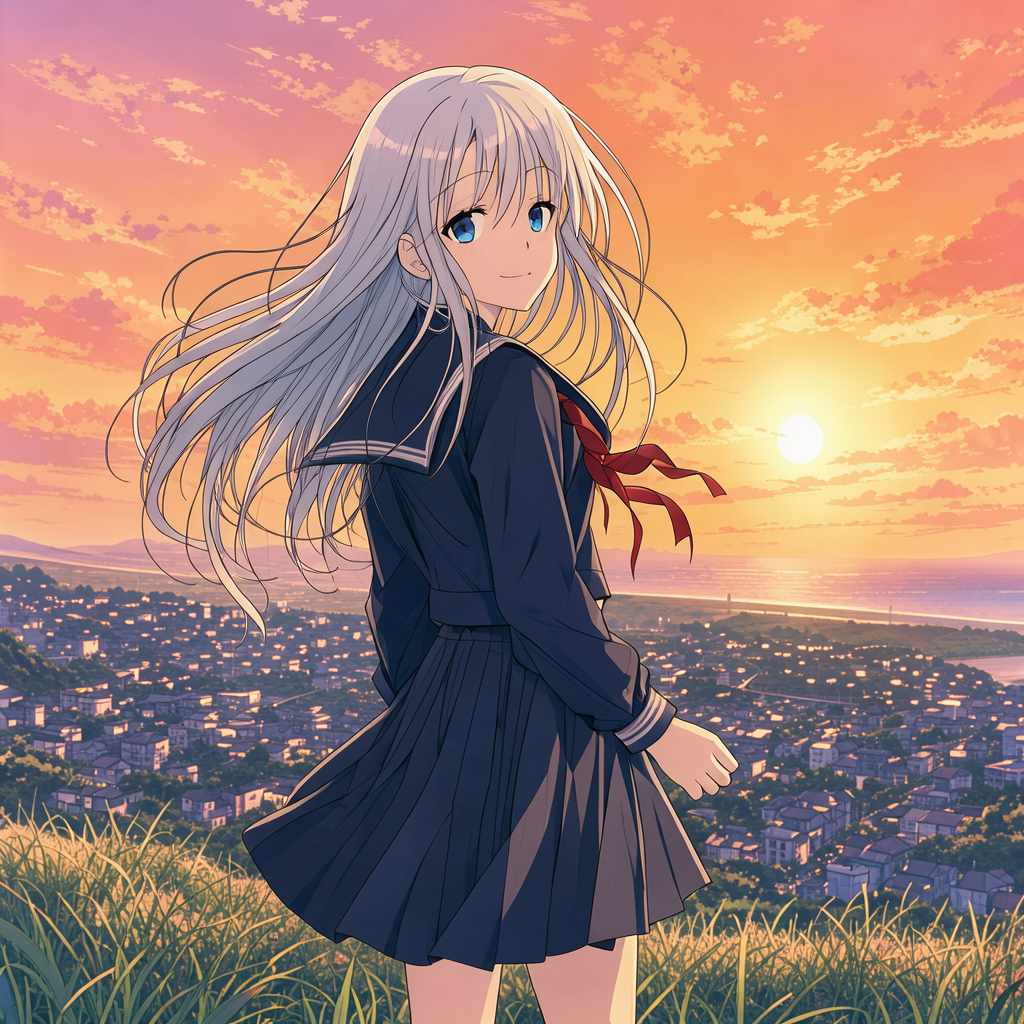
Flux.3 Image Klein Baseで生成した夕焼けの丘に立つ銀髪のセーラー服の少女のアニメ画像
An anime-style illustration of a teenage girl with long silver hair and blue eyes, standing on a grassy hilltop at sunset and looking back over her shoulder with a soft smile. She wears a navy sailor school uniform with a red ribbon, and her hair and skirt sway in the wind. Behind her, a wide orange and pink sky fills the frame, with a small town and a coastline far below. Medium shot from a slightly low angle. Clean, thin black line art, flat cel shading with two-tone shadows, bright saturated colors, and a soft glow around the sun.

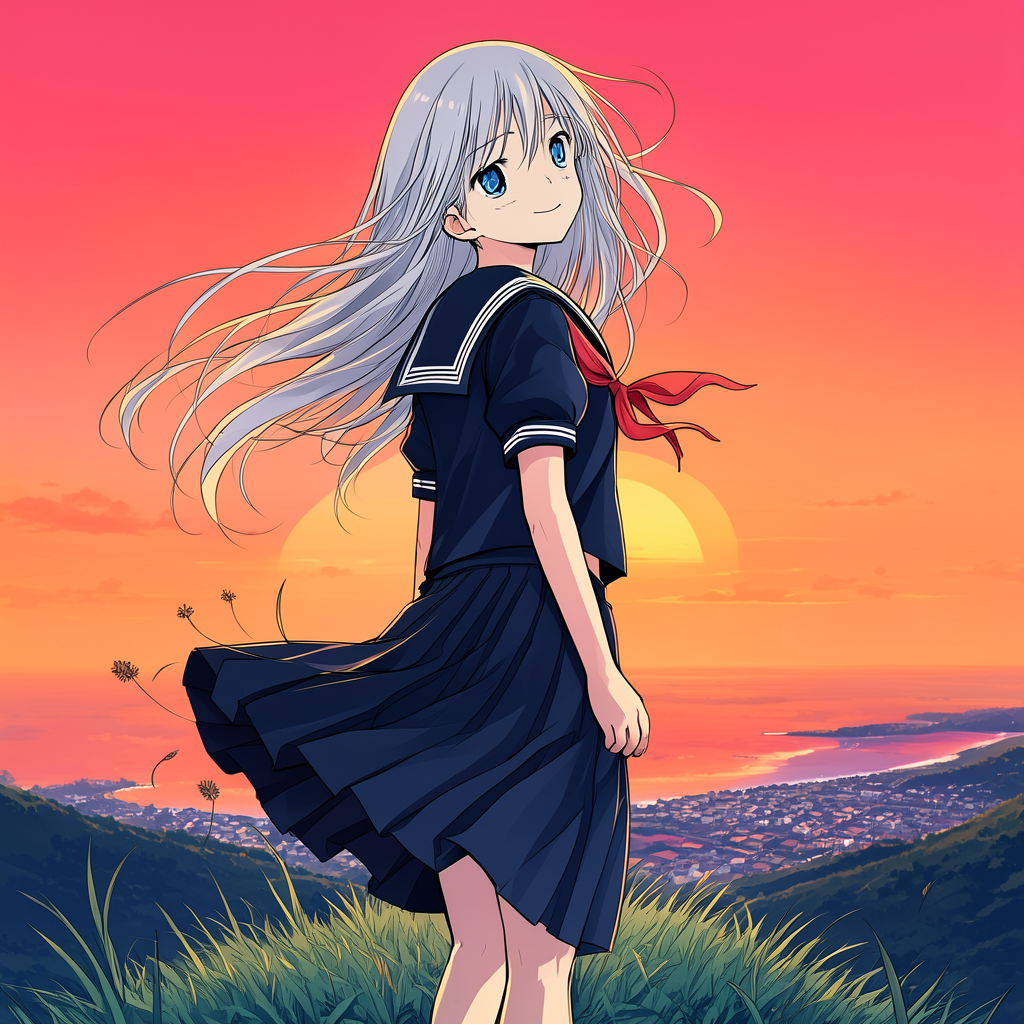
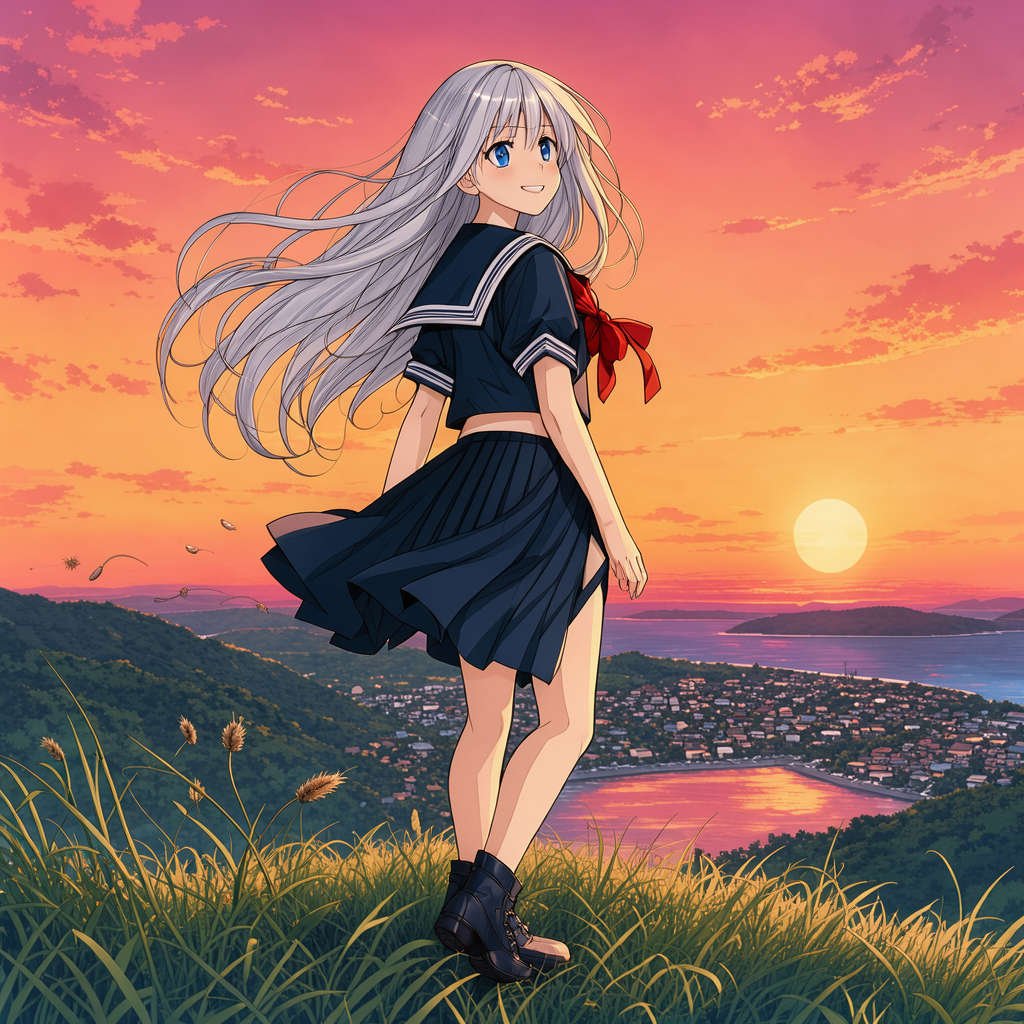
・アニメ+アップサンプラー

Flux.3 Image Klein Baseでアップサンプラーを使って生成したアニメ画像
Anime-style illustration with clean, thin black line art, flat cel shading, two-tone shadows, bright saturated colors, and a soft glow around the setting sun. A medium shot from a slightly low angle shows a teenage East Asian-appearing girl standing on the crest of a grassy hilltop at sunset, her body turned away while she looks back over her shoulder toward the viewer. She has fair skin, large blue eyes, and long silver hair flowing past her waist in broad windblown strands. Her mouth curves into a soft smile as she turns her face upward. She wears a navy sailor school uniform with a white-striped collar, puffed sleeves, a red neck ribbon tied neatly at the chest, and a pleated navy skirt that lifts behind her in the wind. The hem of her skirt streams toward frame-left along with loose blades of grass and several small seed heads. Behind her shoulders, the orange light catches the edges of her hair and uniform trim. In the foreground, dark green grass slopes down from the lower corners to the rounded summit beneath her boots. Across the background, a wide orange and pink sky fills most of the composition, shifting from deep coral near the horizon to vivid magenta above. A round golden sun sits low behind her upper body, surrounded by a pale peach halo. Far below, a small town forms clusters of tiny rooftops beside a winding coastline, with a narrow bay reflecting bands of orange and pink water. Dark hills recede along the distant shore, leaving the expansive sunset unobstructed.

Flux.3 Image Klein Baseで画像編集

Modelsグループでモデルをセットします。
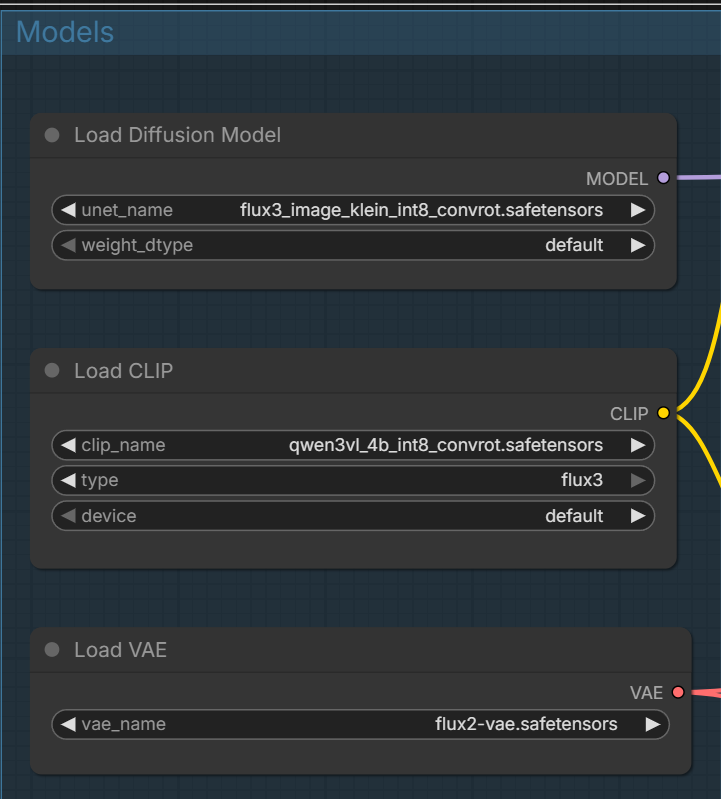
画像編集ワークフローのModelsグループでモデルを設定する画面

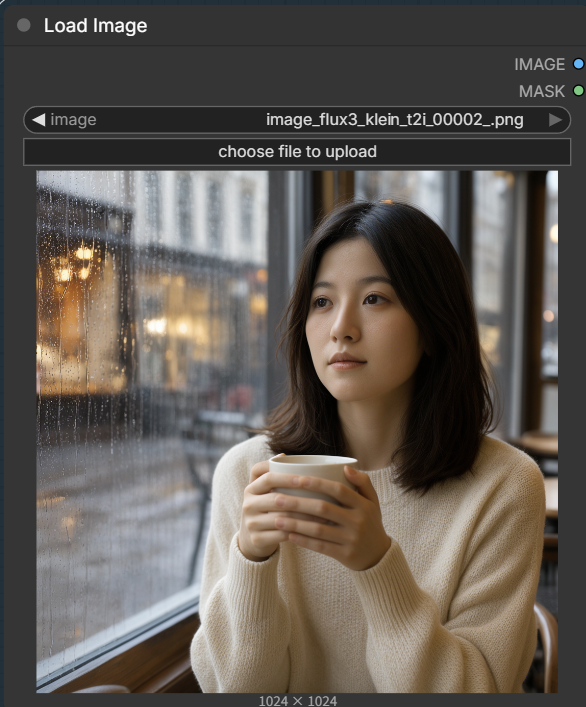
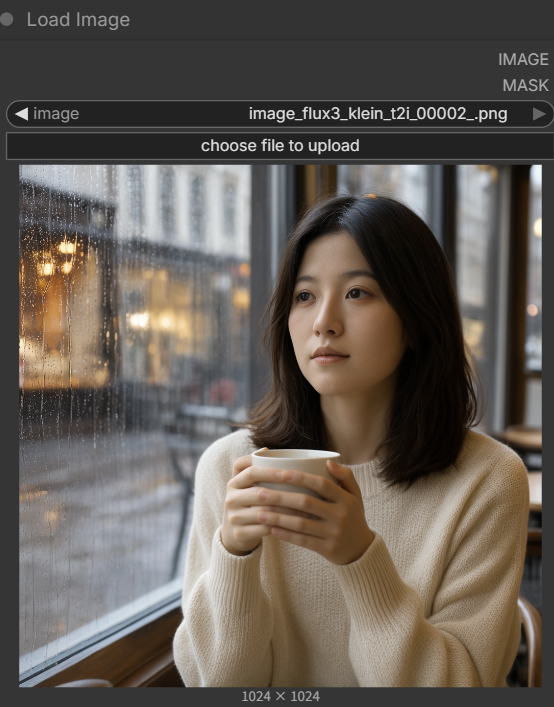
Load Imageで編集元になる画像を取り込みます。

Load Imageで編集元の画像を読み込む画面

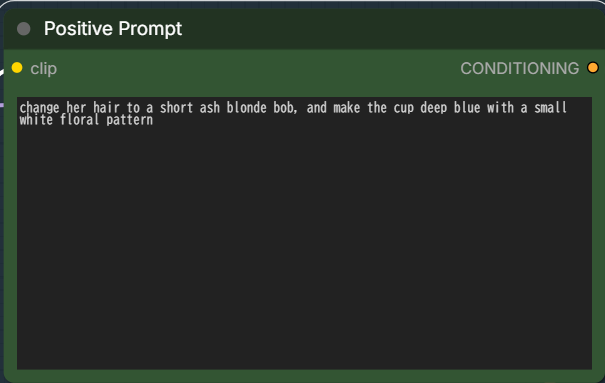
あとはPromptでどう編集したいかを入力します。

編集内容をPromptに入力する画面

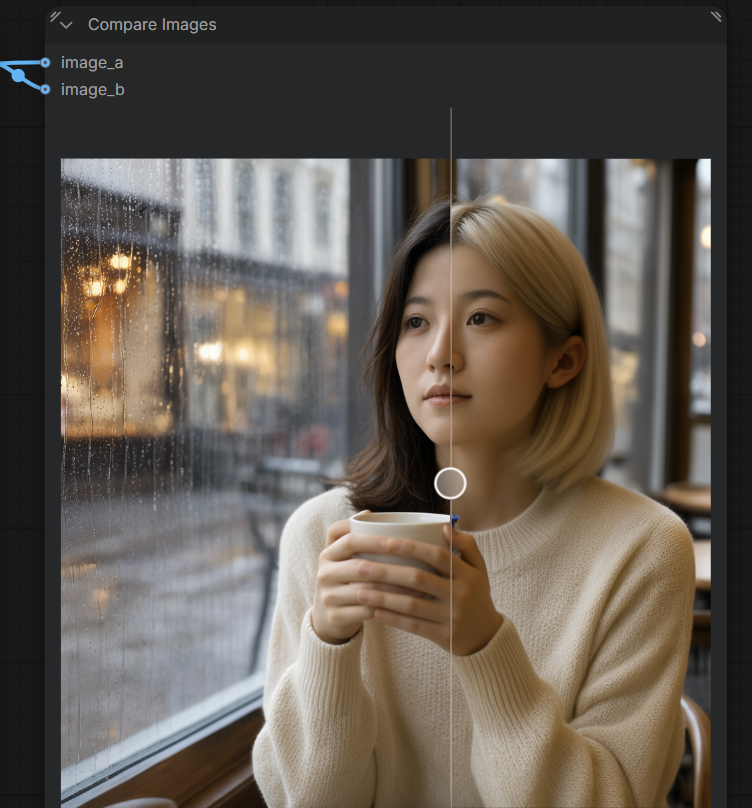
元画像と比較したい場合はNodes 2.0をONにしてCompare Imagesで確認してください。

左上のメニューからONにできます。

メニューのNodes 2.0切り替えスイッチ
Compare Imagesで元画像と編集後の画像を比較する画面

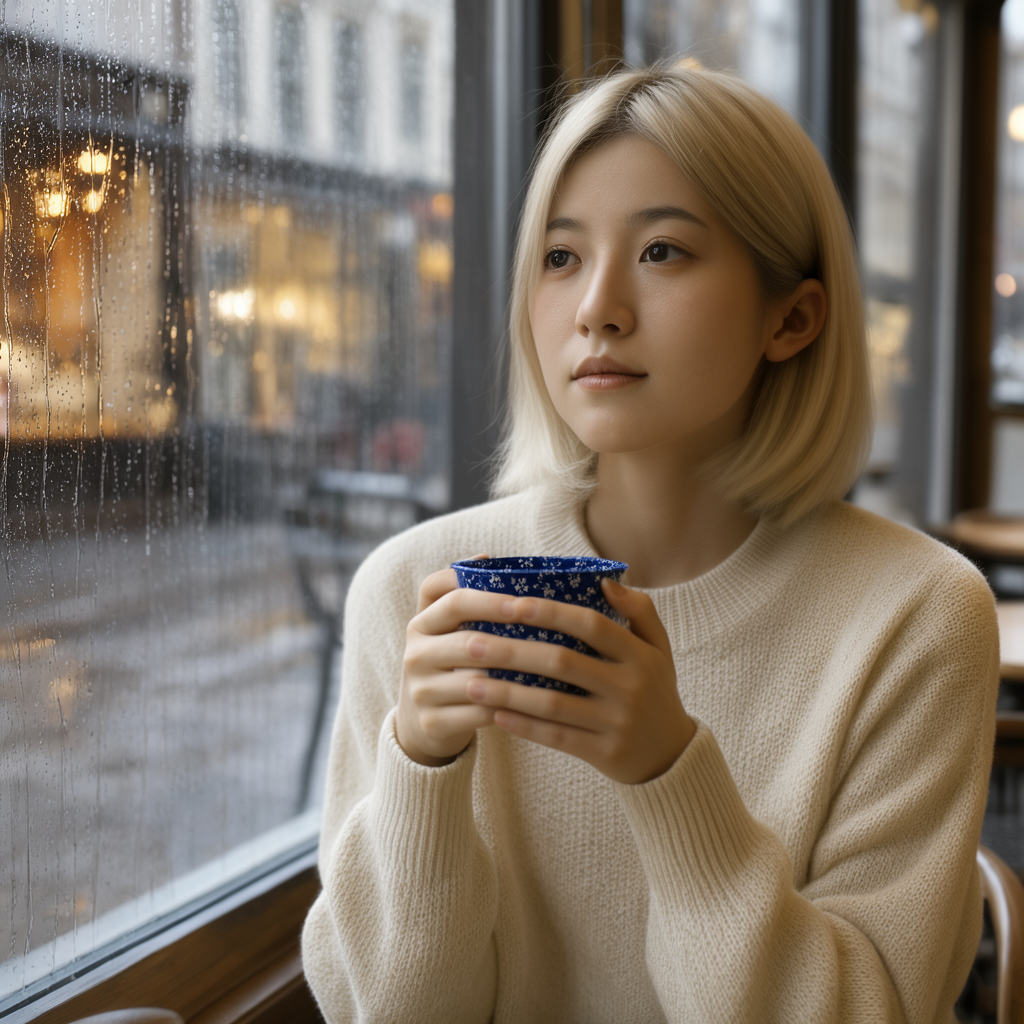
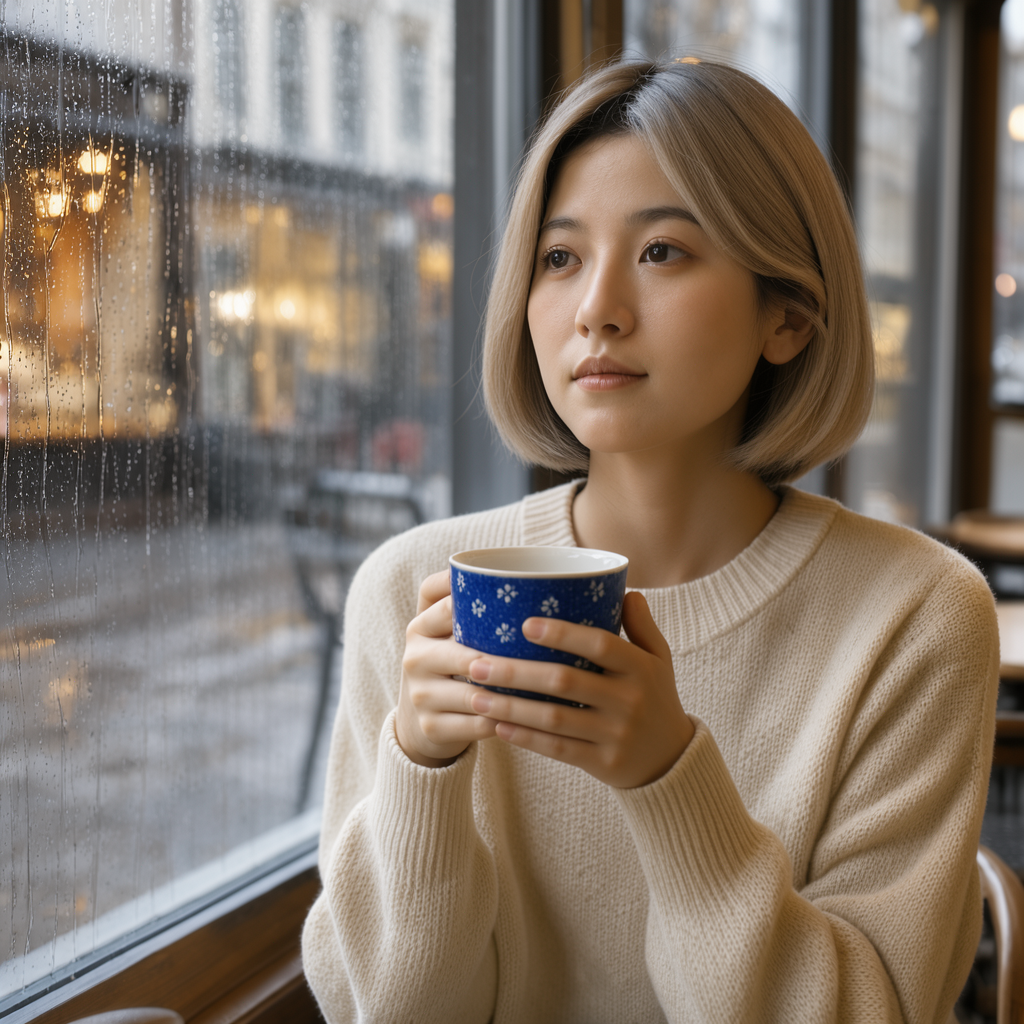
結果:

生成は約40秒でした。

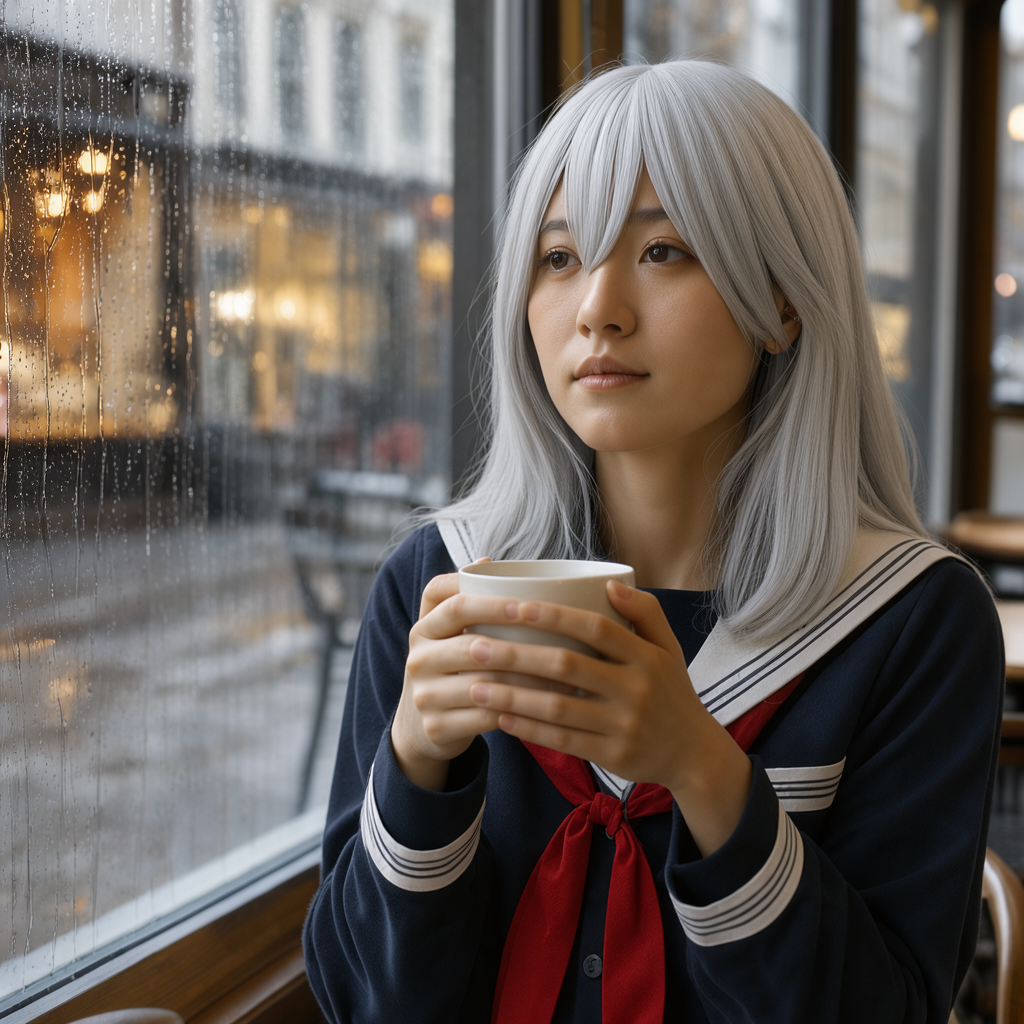
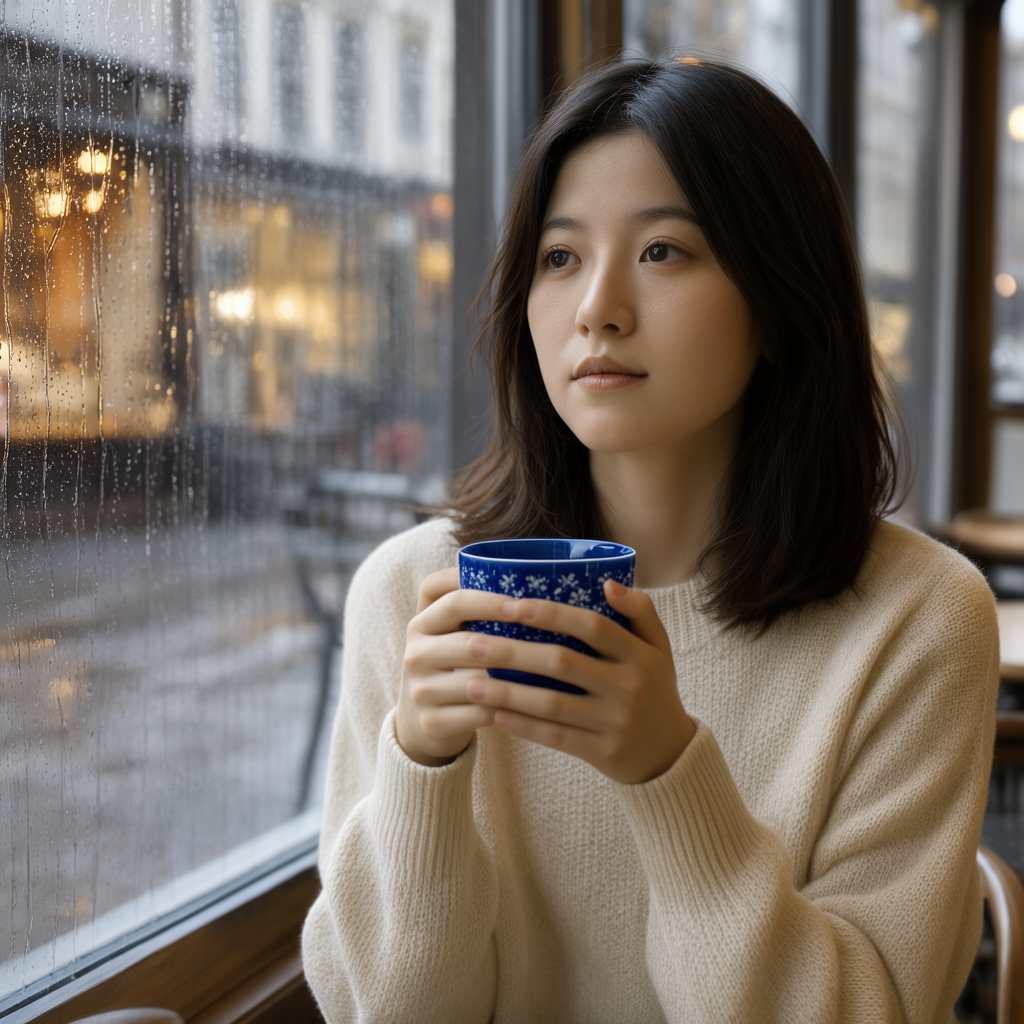
Flux.3 Image Klein Baseで髪をアッシュブロンドのボブに、カップを青い花柄に編集した画像
change her hair to a short ash blonde bob, and make the cup deep blue with a small white floral pattern

Flux.3 Image Klein Distilledでテキストから画像生成

ほぼBaseと一緒です。

Text to Image (Flux.3 Image Klein SD)でモデルをセットしてください。
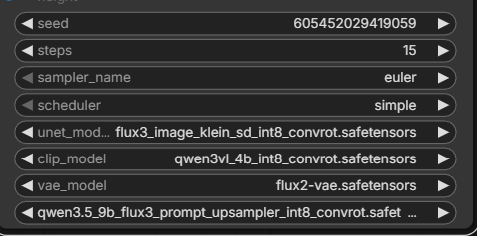
Text to Image (Flux.3 Image Klein SD)サブグラフでモデルを設定する画面

上部で生成したい画像のPromptを入力します。

上部の入力欄に生成したい画像のPromptを入力する画面(Distilled)

Distilled版はdefaultでenable_prompt_upsamplerがONになっています。

DistilledのワークフローでONになっているenable_prompt_upsampler

あとはResolution Selectorでアスペクト比などを設定してください。
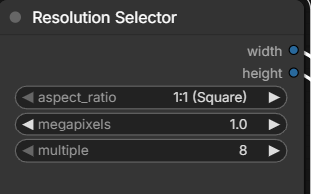
Resolution Selectorでアスペクト比を設定する画面(Distilled)

結果:

Baseと同じPrompt+アップサンプラーONで約17秒でした。
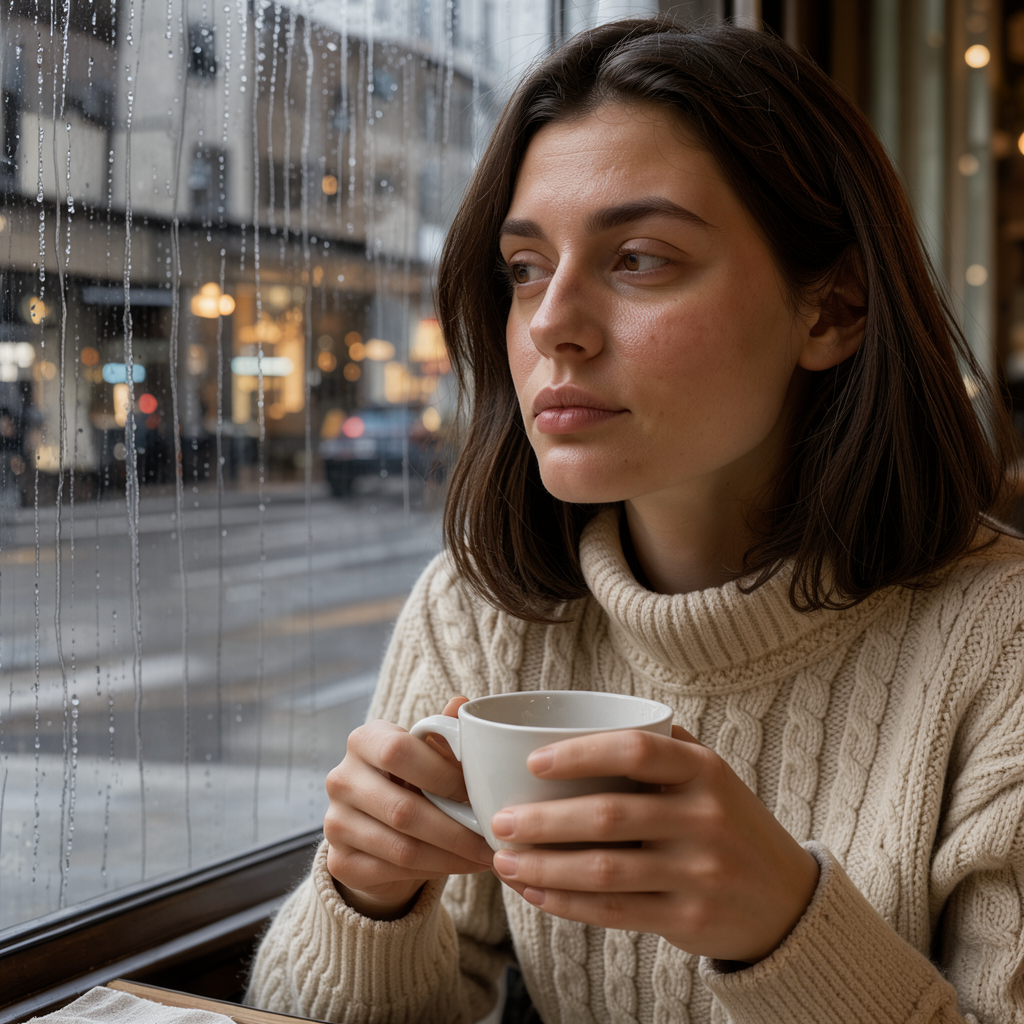
Flux.3 Image Klein Distilledでアップサンプラーを使って生成したフォトリアル画像

アップサンプラーOFFだと約7秒でこんな感じです。

Flux.3 Image Klein Distilledでアップサンプラーを使わずに生成したフォトリアル画像

・アニメ

Flux.3 Image Klein Distilledで生成したアニメ画像

・アニメ+アップサンプラー

Flux.3 Image Klein Distilledでアップサンプラーを使って生成したアニメ画像

Flux.3 Image Klein Distilledで画像編集

こっちも基本Baseと一緒です。

まずモデルをセットします。
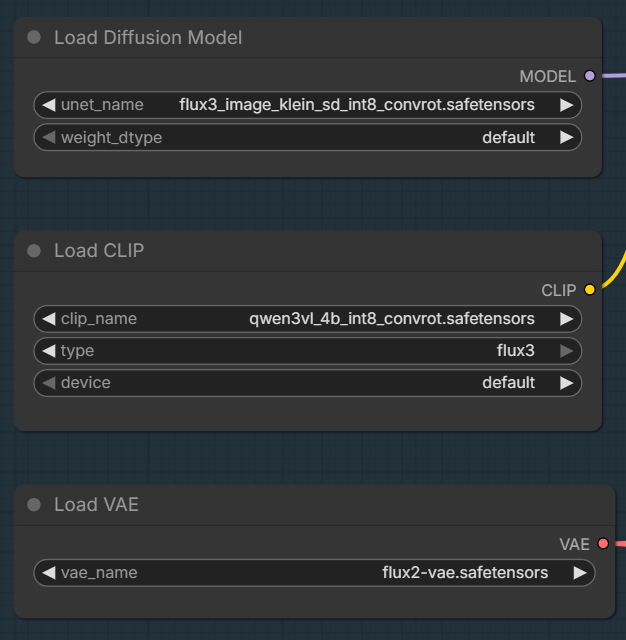
Distilledの画像編集ワークフローでモデルを設定する画面

編集する画像を取り込んでください。

Distilledの画像編集ワークフローで編集する画像を読み込む画面

どう編集したいかPromptを入力します。

デフォルトのPromptを見るとDistilled版は具体的に書かれているので、Baseよりは詳細に書いた方がいいかもしれません。
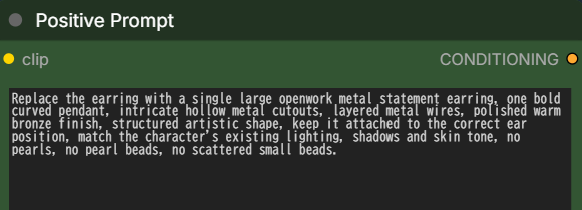
Distilledの画像編集ワークフローで編集内容をPromptに入力する画面

結果:

生成は約14秒でした。

Flux.3 Image Klein Distilledで具体的なPromptを使って髪とカップを編集した画像
Change the woman’s hair to a short chin-length bob in ash blonde, and replace the white ceramic cup with a deep blue glazed ceramic cup with a small white floral pattern. Keep her face, expression, cream knit sweater, hand pose, the rainy café background, and the window lighting identical to the source.

一応Base側と同じPromptでも試したのですが、そこまで結果が大きく変わるようには感じませんでした。
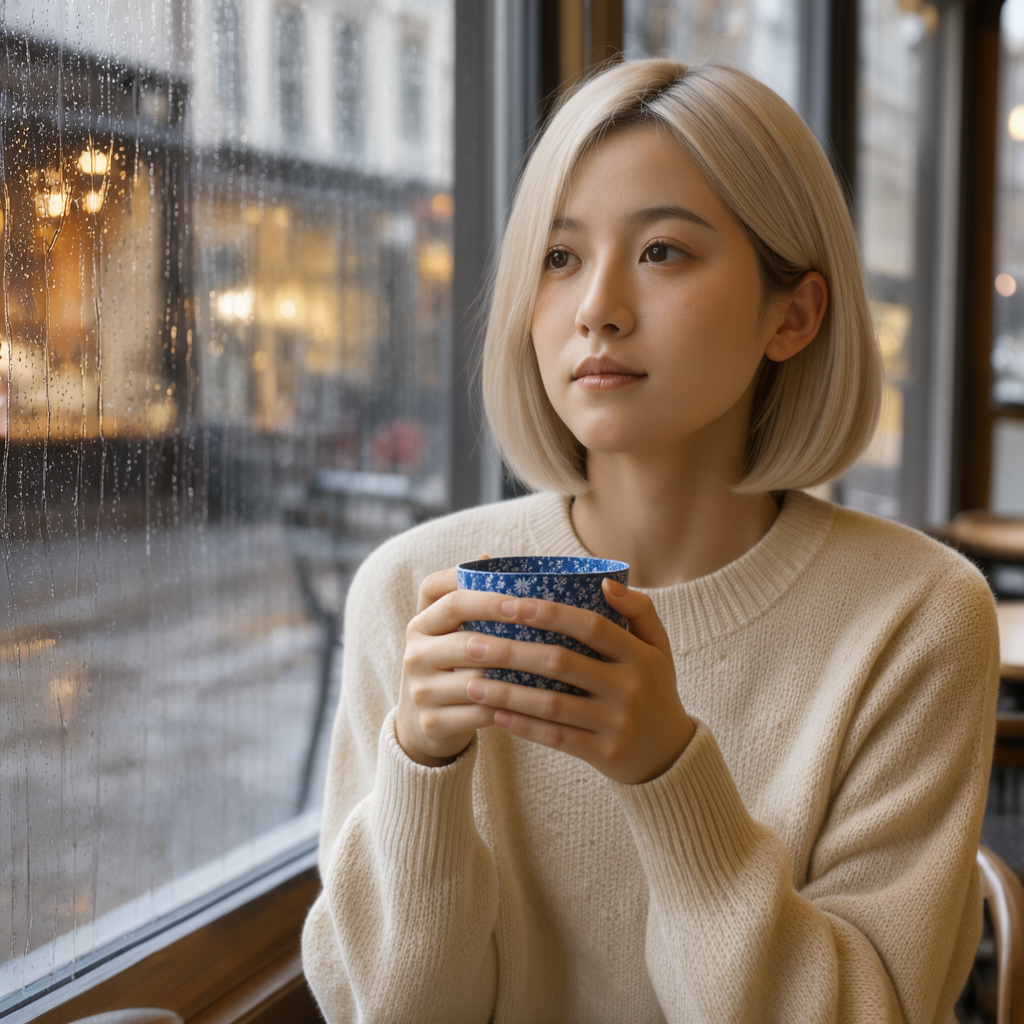
Flux.3 Image Klein DistilledでBaseと同じPromptを使って髪とカップを編集した画像
change her hair to a short ash blonde bob, and make the cup deep blue with a small white floral pattern

複数の参照画像で編集する方法

画像編集のワークフローでは、Set Reference Multi Latentノードに入力画像を追加すると、複数の参照画像を使うことができます。

プロンプト内での呼び名は、1枚目が<ref_image_0>、次が<ref_image_1>という順番です。
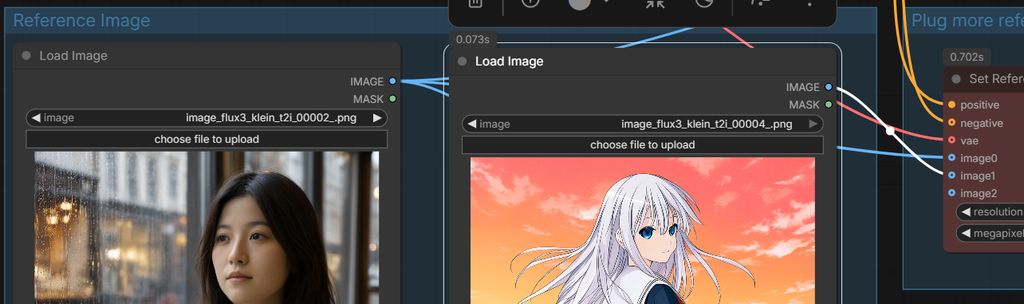
2つのLoad Imageにフォトリアルとアニメの画像を読み込みSet Reference Multi Latentにつないだ画面

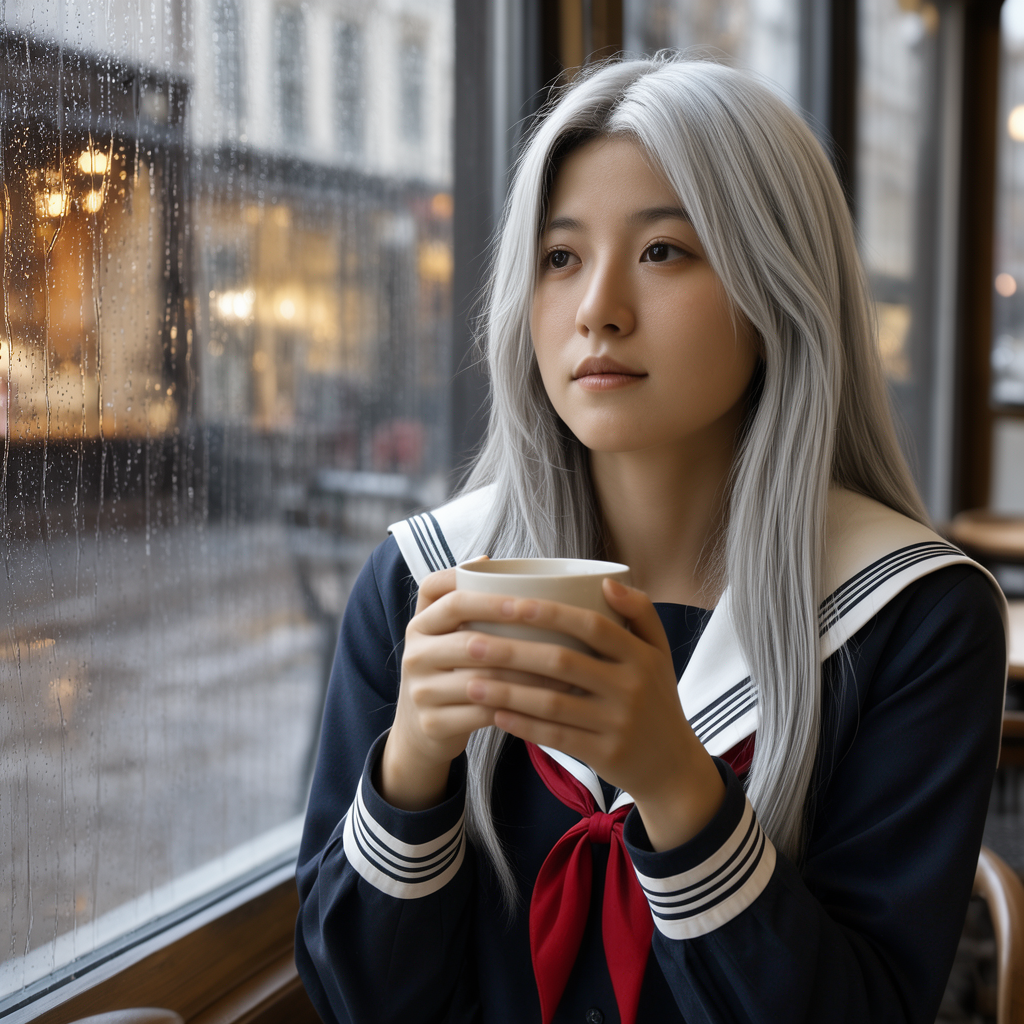
アニメのキャラの髪と服を、フォトリアルの女性に移す指示で約1分9秒でした。
アニメのキャラの銀髪とセーラー服をフォトリアルの女性に移したBaseの編集結果
In <ref_image_0>, change the woman’s hair to the long silver hair from <ref_image_1>, and dress her in the navy sailor school uniform with a red ribbon from <ref_image_1>, rendered photorealistically to match the lighting of <ref_image_0>

Distilledだと27秒でした。

アニメのキャラの銀髪とセーラー服をフォトリアルの女性に移したDistilledの編集結果

バウンディングボックスで編集位置を指定する方法

Create Bounding Boxesノードを使うと、位置を細かく指定した編集用のプロンプトを作ることができます。

Nodes 2.0で使える機能なのでメニューからNodes 2.0をONにしてください。

あと上で書いたようにJSONのworkflowなら使えるみたいなので、そっち使ってください。

Load Imageに編集したい画像を取り込みます。
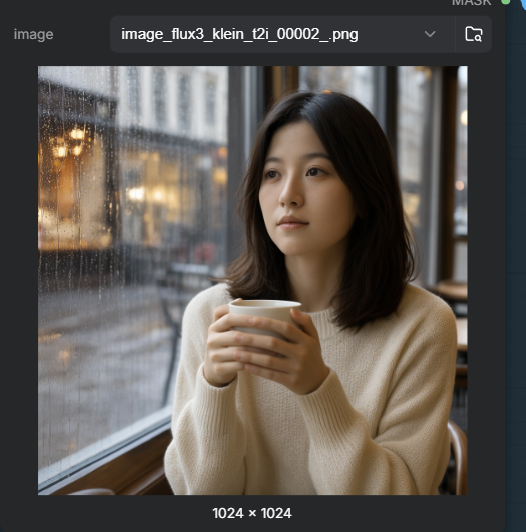
Load ImageをCreate Bounding Boxesのbackgroundにつないで編集したい画像を読み込む画面

そうするとCreate Bounding Boxesに参照画像が反映されるので、編集したい部分をボックスで囲みます。

ノード上をドラッグして指定可能です。
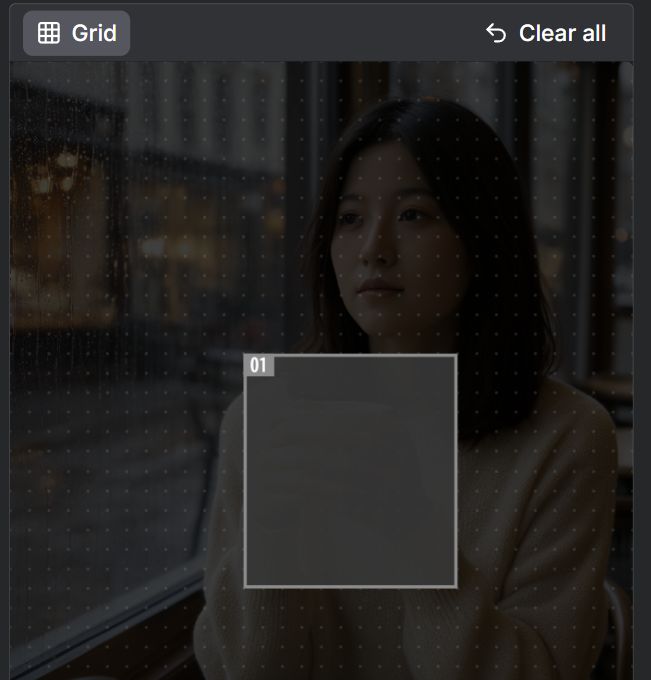
Create Bounding Boxesで編集したいカップをボックスで囲む画面

objは髪やコップ、textは画像の中に文字を入れたいときに使うものです。

objの場合は、元画像のボックスで囲んだ部分がどうなってるかを書きます。

例:a white ceramic cup held in both hands(両手で持たれた白い陶磁器のカップ)
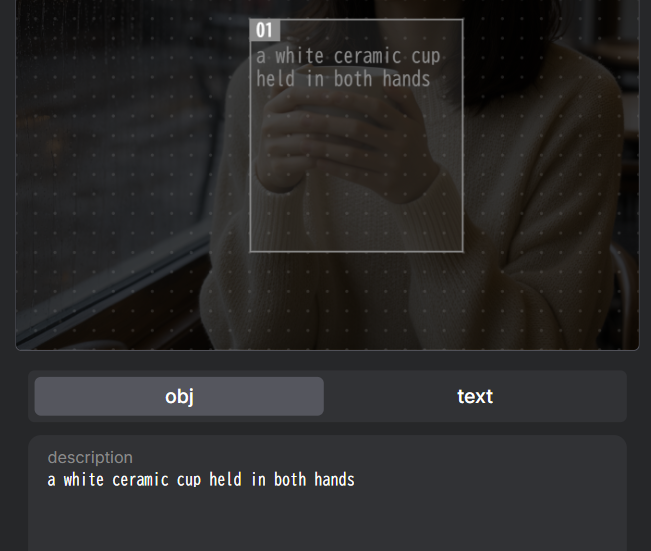
Create Bounding Boxesのobjに囲んだ部分の説明を入力する画面

画像は<ref_image_0>、ボックスはobj・textどちらであっても<obj_1>のように指定できるので、これらの表記を使ってどう編集したいかをPromptに書きます。

In <ref_image_0>, change the cup <obj_1> to a deep blue glazed ceramic cup with a small white floral pattern

結果:

バウンディングボックスで指定したカップを青い花柄に編集した結果

テキストの場合は、textに表示したい文字列、descriptionにtextをどう表示するかを指定します。
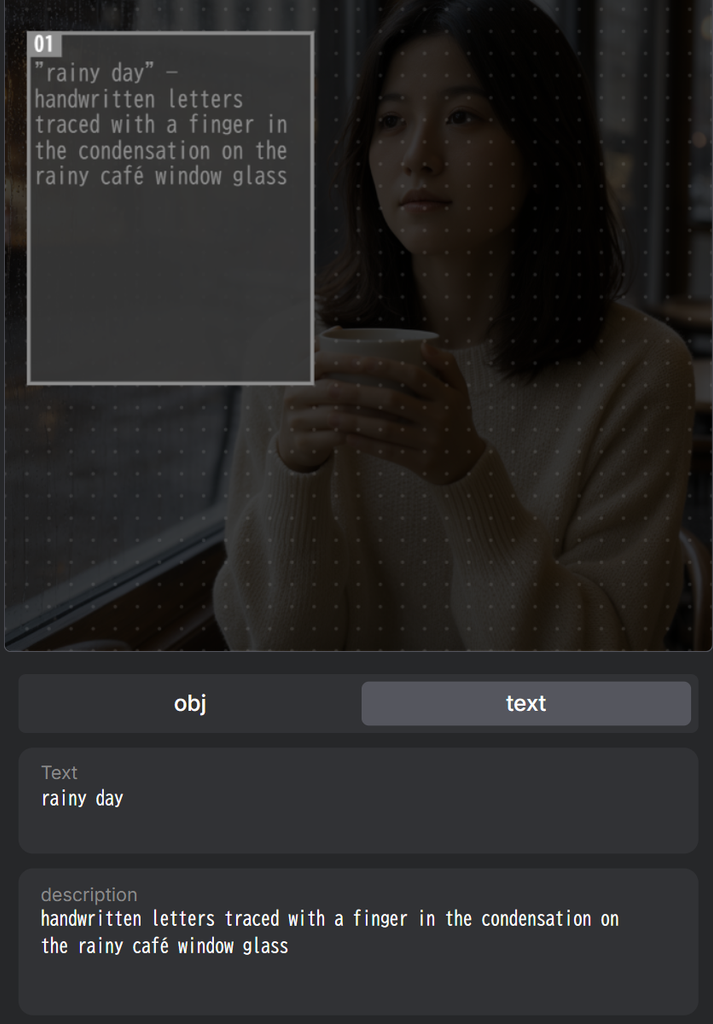
Create Bounding Boxesのtextに表示したい文字列と表示方法を入力する画面

結果:

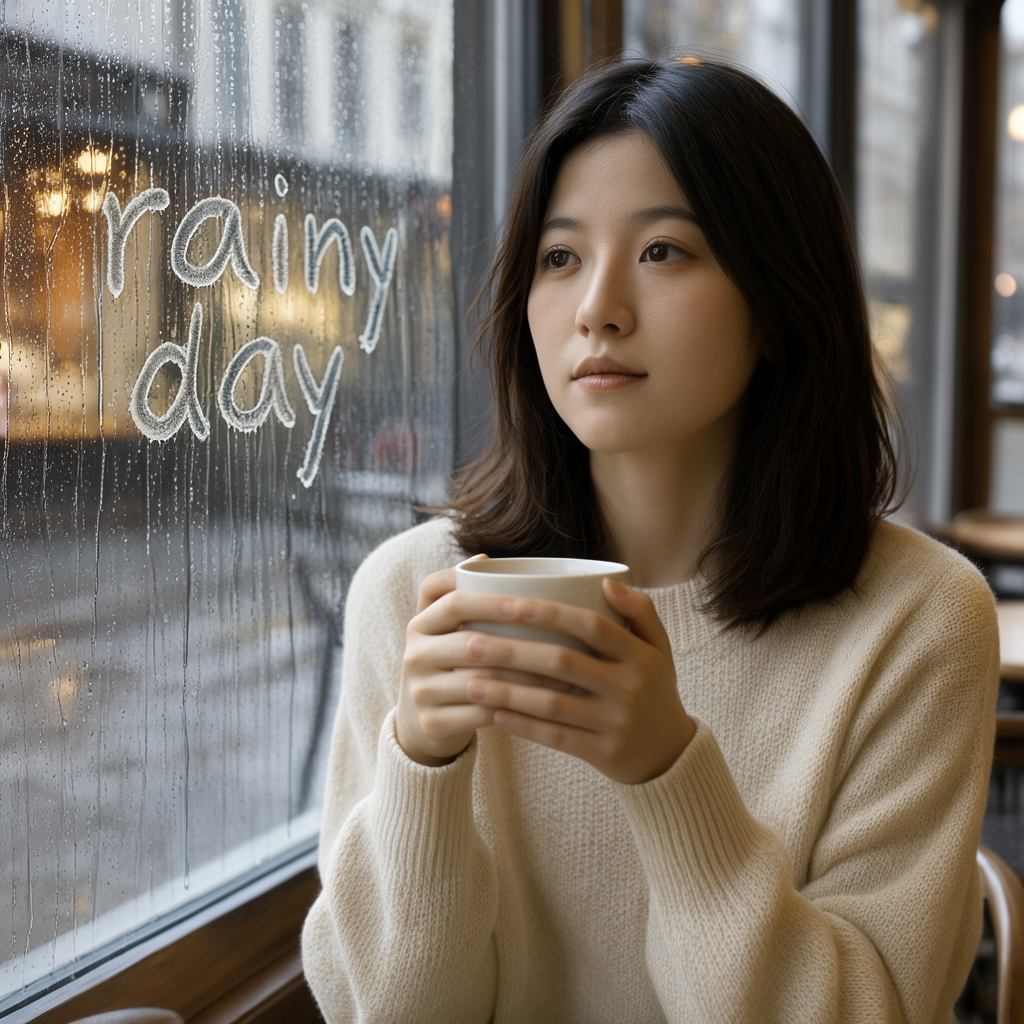
バウンディングボックスで指定した位置に文字を入れた編集結果

書式の詳細と作例は、Bounding boxesで確認してください。

まとめ

まずアニメのクオリティは微妙です。

元々Flux自体フォトリアル向きだし、これは仕方ない気もします。

ただフォトリアルであってもコップを持っている指が結合するなど、少し描写が甘い部分がありました。

ここはRedditとかでも指摘されていた部分なので、期待が大きかった分ちょっと残念です。

ただ生成速度は遅くもなく、文字入れもできるし、画像自体のクオリティは高いので、フォトリアルの画像いろいろ作りたい人にはいいかもしれません。

以上Flux.3 Image Kleinの使い方について紹介しました。

参考になれば幸いです。
タイトルとURLをコピーしました